

Helpful Tips for Glue-down Installations
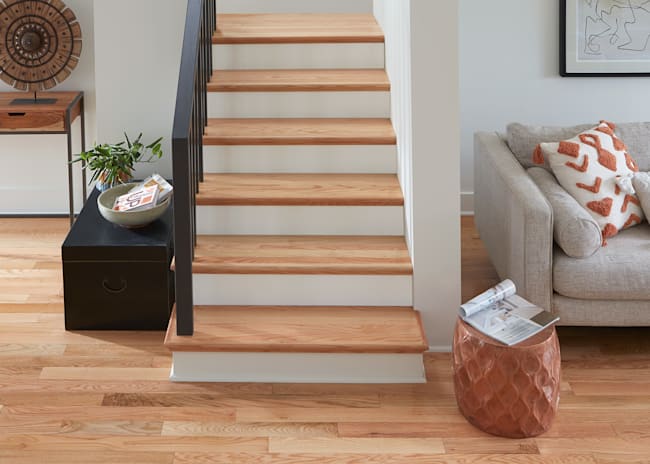
Builder's Pride 9/16" x 7-1/2" Harbor Brazilian Oak Engineered Hardwood Flooring (Pictured)
For these types of installations it is highly recommended to consult with a professional flooring installer for their advice as they can best see all the issues with your specific installation.
FLOORING SELECTION
LL Flooring recommends engineered flooring for glue-down applications or the more stable species of solid wood and bamboo. Solid wood with lower profiles and narrower plank width will normally provide more stability compared to wider and thicker planks. Stability is a term that refers to how resistant or stable an installed wood floor is to changes in temperature and humidity. Solid wood can be more challenging to glue down due to minor width variation, and the fact that many planks may not be perfectly straight. Engineered floors produce straighter boards and less width variation, which makes for an easier floor to glue down. Engineered floors are also the best choice when gluing over concrete due to their dimensional stability.
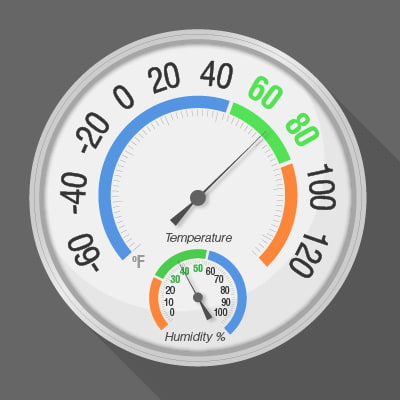
ACCLIMATION
Wood, Bamboo, and Cork flooring will need to acclimate in the installation area. For most products the room should be conditioned to between 60˚- 80˚F and 30-50% relative humidity for best results. Check the installation instructions of the product for proper temperature and humidity settings, and maintain these levels. The HVAC system should be functional and wet trades complete prior to bringing the flooring into the home for acclimation. Postpone delivery of wood until proper home climate is reached. Reschedule installation until proper environment is reached. Poor acclimation can result in excessive board squeaking and gaps and is not manufacturer related.
MOISTURE
Follow closely the adhesive labeling instructions, Technical Data sheet, and the flooring products installation instructions, and advisories pertaining to if (moisture testing procedures are necessary, if moisture barriers are required or limits of use and trowel size recommendations). Depending on the selection and application of a particular adhesive, you may be required to test for concrete moisture and or to use moisture barriers. When in doubt about an adhesive application or requirement call the adhesive manufacturer. Not following the adhesive manufacturer recommendations of the products selected for use can lead to installation failure or product damage and will void your warranty.
APPEARANCE
Keep in mind that wood, bamboo, and cork is a natural product so no two floor boards will be identical. Variations in appearance (grain, color, etc.) are completely normal. Many exotic floors will develop a richer, darker color (patina) as they age. Color change normally goes unnoticed, until a rug or piece of furniture is moved and the floor may appear lighter under the rug or furniture. To fix keep the area uncovered for several months up to 8 months and the color will eventually blend in with the rest of the flooring. The rate of color change can vary on species of wood and amount of natural lighting in the home. Color change in wood is not manufacturer related.
PRE-INSTALLATION INSPECTION
1. The installer is the final quality inspector.
2. “Racking out” the floor or laying out each piece allows the installer to visually inspect the flooring for imperfections that can be cut out or adjustments made before installing.
3. Defective boards if used should be set aside or relocated to hidden places (such as a closet) by the installer. If a board has an unacceptable defect (hole, split, crack, etc.) the installer should cut it out or set it aside.
4. Generally, a minimum of 5% should be added to the actual square footage needed as an allowance for cutting waste in domestic woods and 8-10% for exotics. Some species like Australian Cypress may have a larger expected “scrap” ratio due to the characteristics of the species. Replace these boards using the added 5 – 10% of material ordered for the job.If you have a higher than average scrap rate and are unable to complete your installation, take samples to the store nearest you. Bellawood liability is limited to replacement of defective material only in excess of 5% (excluding the cutting allowance).
6. The use of stain, touch-up pen or filler stick for correction during installation is accepted as normal procedure.
7. “Repairs” – Always keep a partial box from your initial installation for any future repairs or board replacement.
8. “Touch-up markers” or color filler sticks used for correcting nicks or chips during and after pre-finished wood installation is a normal procedure.
9. Do not allow adhesives to dry out or skin-over before placing boards.
10. Lumber Liquidators recommends moisture testing, the use of moisture barriers and approved wood flooring adhesives from Mapei and Bostik and Exmore.
11. To ensure glue transfer, glue manufactures may recommend rolling the flooring throughout installation using a 100 lb roller
12. For the best result, do not mix adhesive products. Use moisture barriers and adhesives from the same manufacturer’s product line.
13. Use the trowel size recommended by the adhesive company to get required spread rate and ridging height. Typically, trowel size is determined by board type, size and surface texture. (Ensure a 95% min glue-to-board glue transfer).
14. During constant use trowel teeth will wear down. For best glue coverage use a new trowel with each new container of adhesive.
15. Follow glue manufacturer’s labeling instructions regarding adhesive set time, correct trowel size, removal of surface sealers or contaminates and use of moisture barriers.
16. Intermix product from several cartons as you install the floor to insure color, grain and shade mix.
17. Install the flooring parallel to the longest wall in the room. Keep the flooring straight using a chalk line.
18. Blue painter tape #2080 can be used to keep rows or sections of floor boards together until the adhesive has cured (incorrect tape can harm the finish.) During installation tape together 4 or 5 board rows at 18” intervals.
19. Discard twisted or warped boards.
20. [CAUTION]: Many installers choose to use straps or clamps in an effort to force board rows tighter together during installation. Be aware that over-strapping may adversely affect the floor and can result in glue-bond failure, seam peaking, twisted boards, or out-of-square flooring board alignment.
Cured adhesive can cloud, chemically damage or etch the floor’s finish. Clean fresh adhesive from the surface of the floor frequently with mineral spirits or manufacturer-recommended remover. Use clean towels changing frequently to prevent haze and adhesive residue.
We appreciate your business and hope that you enjoy your new floor!
