

Tips for Installing Wood Flooring
Help your new floors maintain their splendor and beauty by installing them properly. Learn key tips for installing wood flooring at LL Flooring.
Whether you're a seasoned DIY enthusiast or a first-time flooring adventurer, brush up on the basics with this guide. Learn how to install hardwood flooring and bring your dream space to life.
What Do I Need to Know Before Installing Hardwood Floors?
Deciding to install new flooring is exciting, but there are a few things to consider.
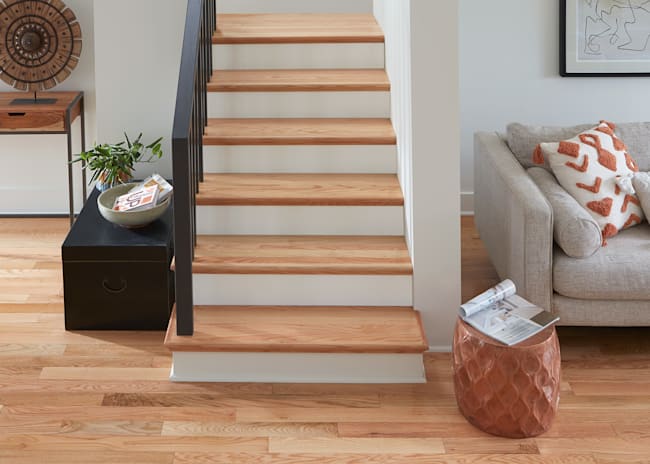
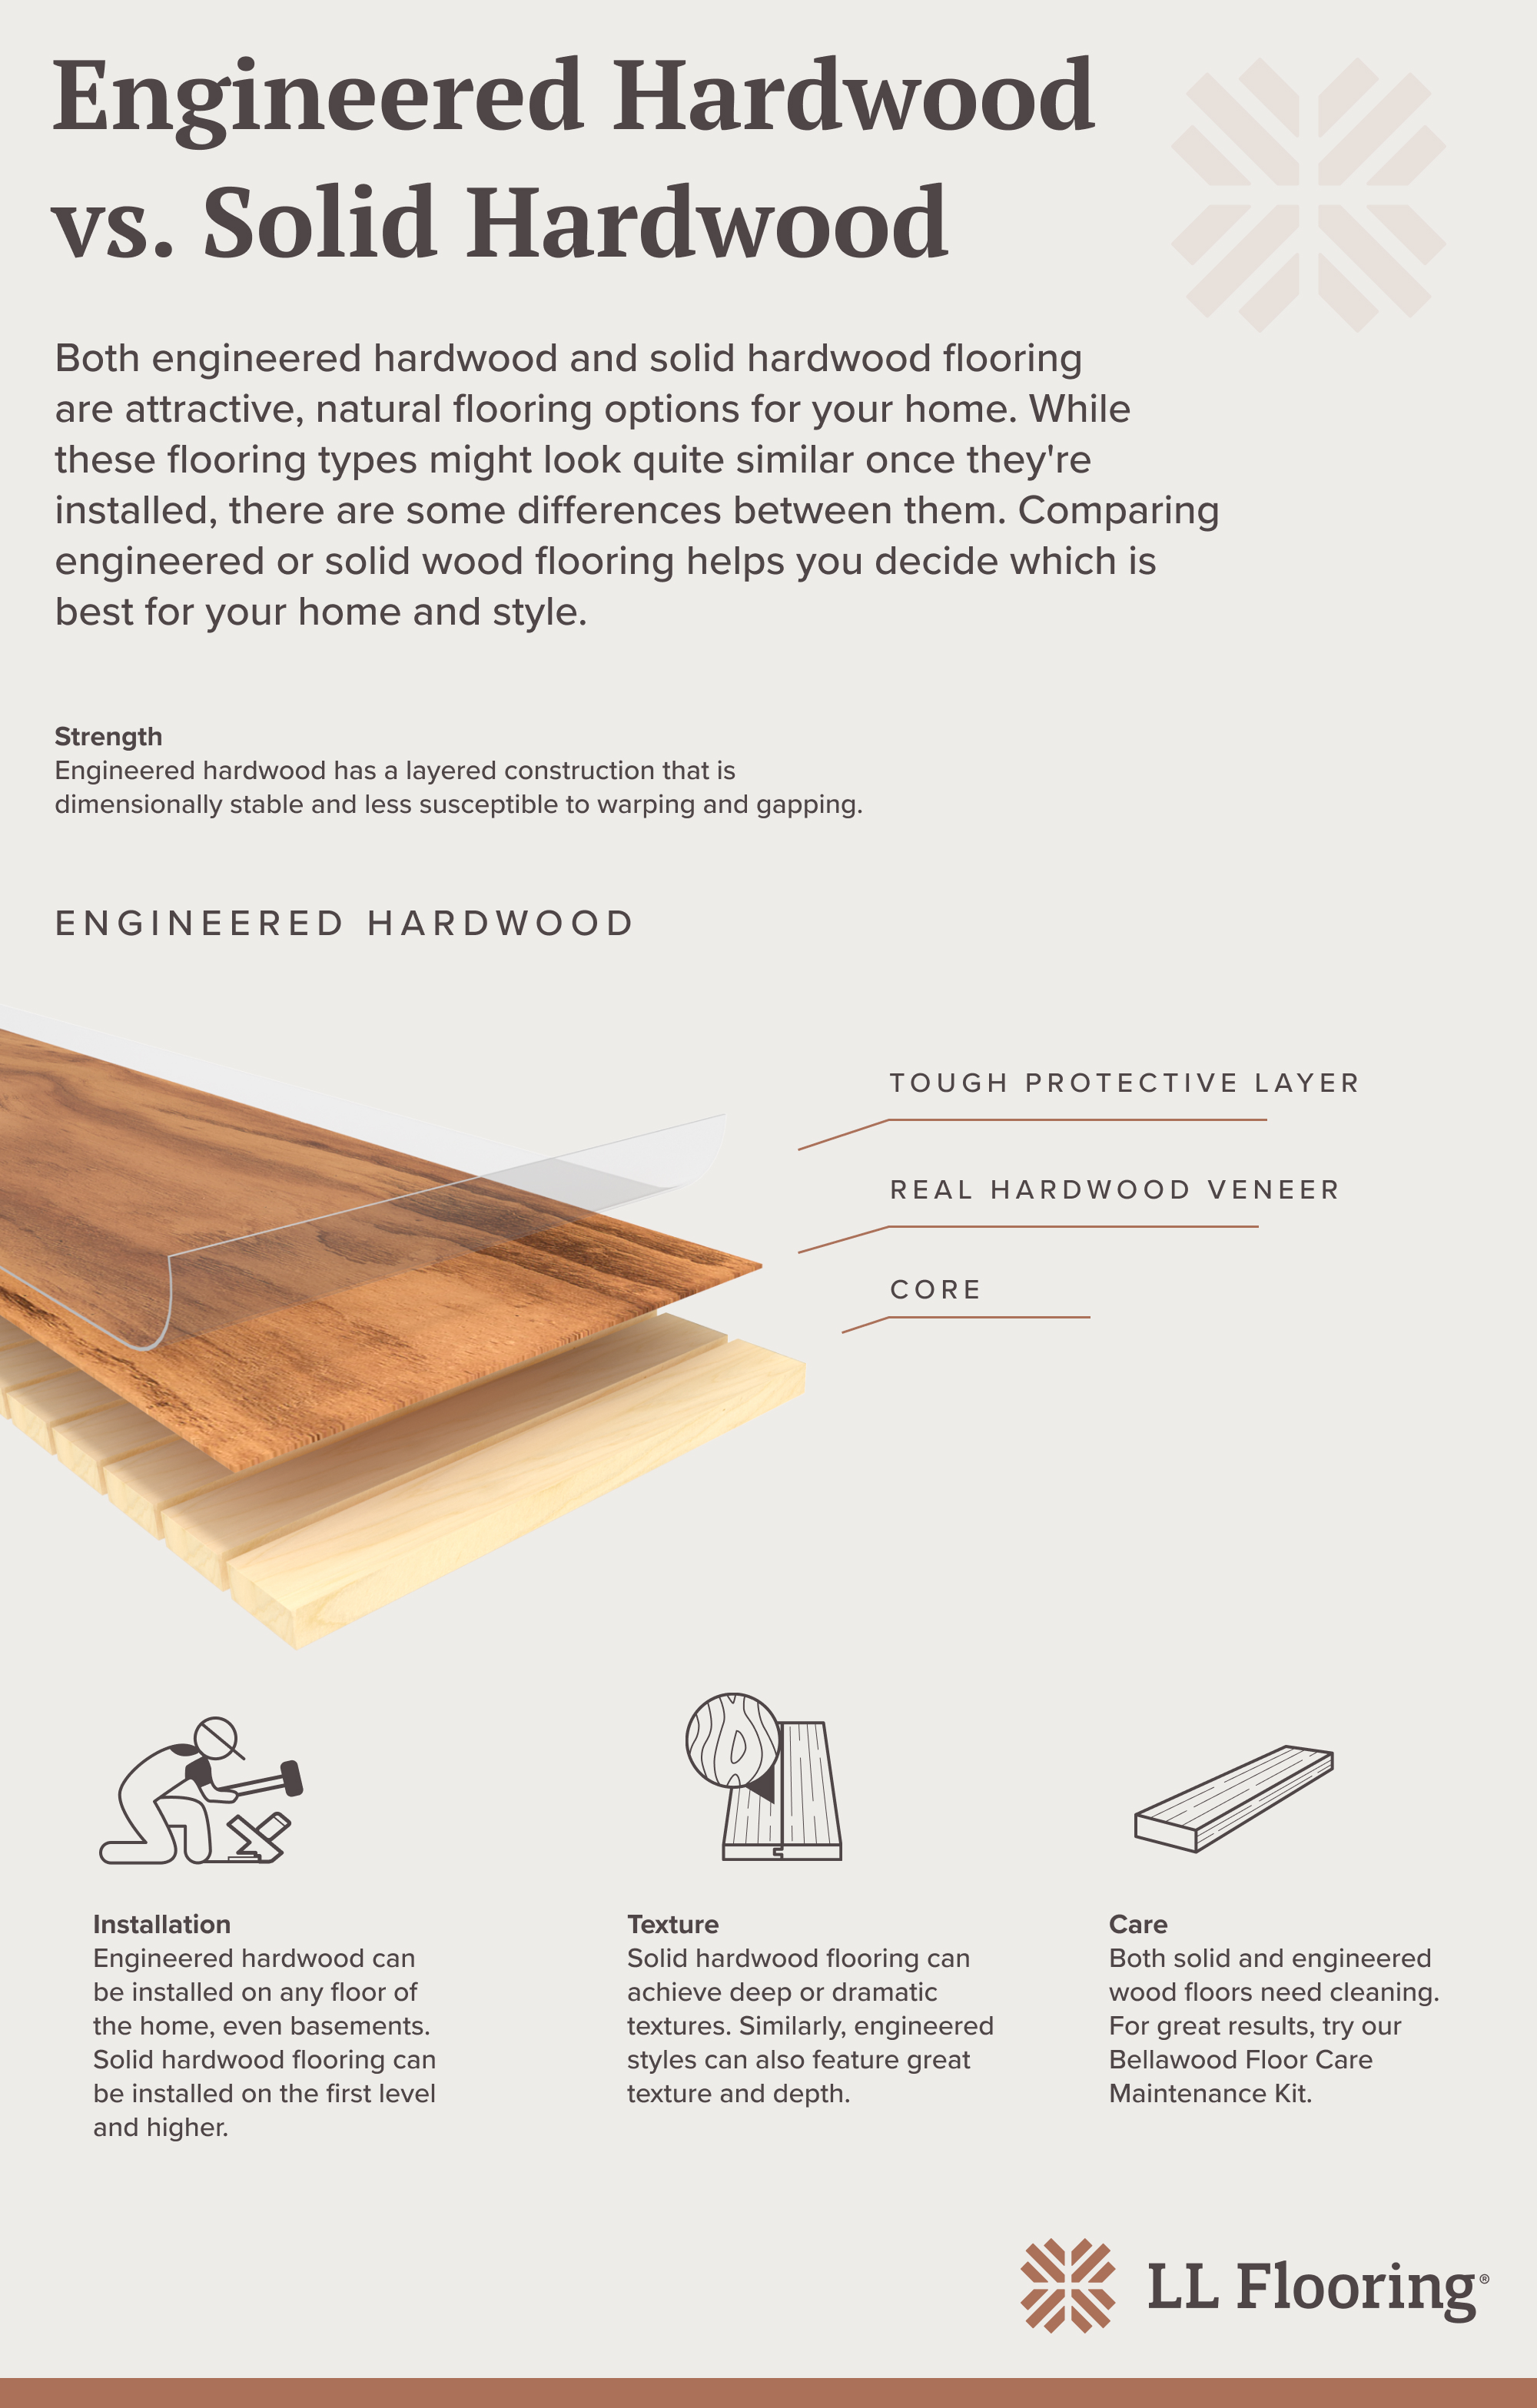
Solid Vs. Engineered Hardwood
Understanding the type of hardwood boards is essential. There are two types of hardwood: solid and engineered. Solid hardwood boards are made of a single piece of wood. Engineered hardwood combines a top layer of real hardwood (called a veneer) over a high-quality core made from plywood, lumber core, MDF, or stone-polymer composite. Both solid and engineered hardwood bring beauty and style to your home but perform differently in certain spaces.
For example, solid hardwood is unsuitable for below-ground areas like basements—engineered hardwood fares well in basements and areas with high moisture.
Installation Method
Knowing the installation method recommended for your specific type of hardwood flooring will help you budget and allocate time. Common installation techniques include nail-down, staple-down, glue-down, or floating. While some methods are DIY-friendly, others may require help from a professional.
Where Do You Start When Installing Hardwood Floors?
Typically begin at the longest, most visible straight wall—this will serve as a starting point for installing your new floors. If you're working with professional installers, you should let them know which direction you want your planks to run in so they can plan accordingly. You'll get the best aesthetic results if you plan to have full planks at your focal point, which in most cases is the longest unbroken wall in the room.
If you're not modifying your subfloor, you'll want to lay your flooring perpendicular to the subfloor's joists. If you do need to install your flooring parallel to the subfloor joists, you'll need to fasten a secondary layer of 15/32 plywood panels to the subfloor using ring or screw shanked nails, or proprietary screws long enough to penetrate only the existing subfloor and not the joists.
Next, measure and mark the expansion space, which is the distance from the starting wall and parallel to the room's length. An expansion space allows the wood to expand and contract without causing damage to the floor. Don't worry; this is a natural process in wood—it expands and contracts with room temperature and humidity changes. The size of the expansion space will depend on the floor's performance and characteristics. So, refer to the Warranty, Installation, and Care (WIC) guide for the appropriate expansion space measurements.
After that, you'll want to establish a guideline. Use chalk or a long straight edge to create a straight line along the marked expansion space. Doing this will help ensure that your first row of flooring is aligned properly. You'll also want to consider how you're going to account for design features like fireplaces, doors, cabinets, and transitions between rooms.
Determine the width of the last row. Measure the width of the room and the width of the boards. If the boards are too small, adjusting the starting position or cutting the first row is a good idea. This way, when you install your new floors, everything will look perfectly balanced.
Now you're ready to install the first row! Use spacers between the boards and the wall to maintain space for expansion.
What Is the Correct Way to Install Hardwood Floors?
To ensure you install your floors with minimal issues, it's important to follow a process.
Subfloor Prep
Ensure that your subfloor is clean, dry, and level. Also, don't forget to check for signs of moisture or water damage. If you find any water stains or leaks, address the underlying issue before installing.
Moisture Mitigation
If necessary, install a moisture barrier. For areas with high moisture, such as basements or concrete subfloors, a moisture barrier is key. This will ensure the overall performance of your new floors.
Depending on the type of flooring you install, moisture mitigation will come in different forms. For example, floating applications of engineered flooring may require a poly underlayment. Other forms of engineered and solid hardwood may call for a silicone vapor shield and plywood underlayment. Consult your WIC for more specific guidance.
Acclimation
Speaking of moisture, you'll want to acclimate your hardwood flooring. This simple yet necessary step allows the new floors to adjust to the room's climate. Doing this ensures your new floors perform well without issues.
When acclimating your floors, ensure that conditions remain as close as possible to normal living conditions. The time you have to let the flooring acclimate will vary. To find out how long your wood floor should sit in the house before installation, consult your WIC guide for an estimate.
Installation Time
How long does it take to install flooring? Installation time depends on the size of the room, the complexity of the room's layout, the type of hardwood floor being installed, and the installer's experience.

Tips for Installation Methods
We recommend contacting a professional before embarking on your new renovation project. However, experienced DIYers may be able to tackle the job independently, with a bit of guidance, of course. Below are tips for installing wood flooring based on the installation method. Our flooring experts will be able to inform you of the estimated installation time.
Click
Refer to your WIC guide to determine the type of click mechanism of your flooring and proceed according to its information to ensure your installation goes smoothly. Stagger the end joints of the boards in adjacent rows for a flawless installation. This will also minimize the appearance of repetitive patterns.
Non-Click
Certain flooring boards require glue or fasteners to secure them to the subfloor, such as tongue and groove profile boards. When installing tongue and groove boards, consult your WIC guide for specific information, but you may need to gently push the board back and down to ensure a snug fit. Use a tapping block and mallet to fully engage the tongue and groove.
As you install the other boards, fit the groove of each new plank onto the tongue of the previous row. Be sure to check for any gaps between the boards. For the last row, you may need to use a pull bar to ensure a tight fit. Insert the pull bar into the groove side of the plank and tap it to fuse the boards.
Nail-Down
Place nails at the recommended intervals along the length of each board. Be sure to avoid nailing too close to the end of the boards, which can cause splitting. To achieve a smooth floor, use a nail set to tap the nail below the surface.
Don't forget to measure and cut the boards as needed to fit around doorways and corners. A miter or table saw will make this easier.
After installation is complete, use wood filler or putty that matches the color of the flooring to fill in the nail holes.
Install the Perfect Foundation
From décor guides to professional installation, we offer everything you need to achieve the space of your dreams. Consult with our flooring experts to begin your renovation project.
Follow LL Style on Instagram & Pinterest
ALSO, do you learn about home improvement and design with fun and informative videos? Subscribe to the LL Flooring YouTube Channel to learn more, leave comments or ideas that helped you, and join the community!
Related Articles


