
LLStyle PRO Spotlight: DIY Flooring Installation | Guest Post by Designer Crystel Montenegro
Hello again! It's been quite a busy year for our little family, and I've been having a lot of fun fixing up our house in Nebraska. I still have plenty of DIY projects to share from our previous homes, but I'm too excited.
Hello again! It's been quite a busy year for our little family, and I've been having a lot of fun fixing up our house in Nebraska. I still have plenty of DIY projects to share from our previous homes, but I'm too excited about my new Duravana Hybrid Resilient flooring to wait until I'm caught up. So, this tutorial is jumping to the front of the line.
LL Flooring launched their new Duravana flooring line last year, and it's awesome. It's the latest and greatest in flooring technology. They combined all the best features of vinyl, laminate, and wood, to create an ultra-hybrid plank flooring that's superior to anything else on the market. I love that it's family-friendly, eco-friendly, waterproof, and dent/scratch resistant.
Duravana flooring is also easy to cut, and with a simple snap and tap, there are minimal tools needed for installation. For a moderate-sized room, you could easily finish an install in one afternoon. Duravana is seriously the future of hard surface flooring.
(This post includes affiliate links. If you purchase from these links, I may get a small commission from the seller.
But the great thing is, this doesn’t cost you any extra money!)
Materials
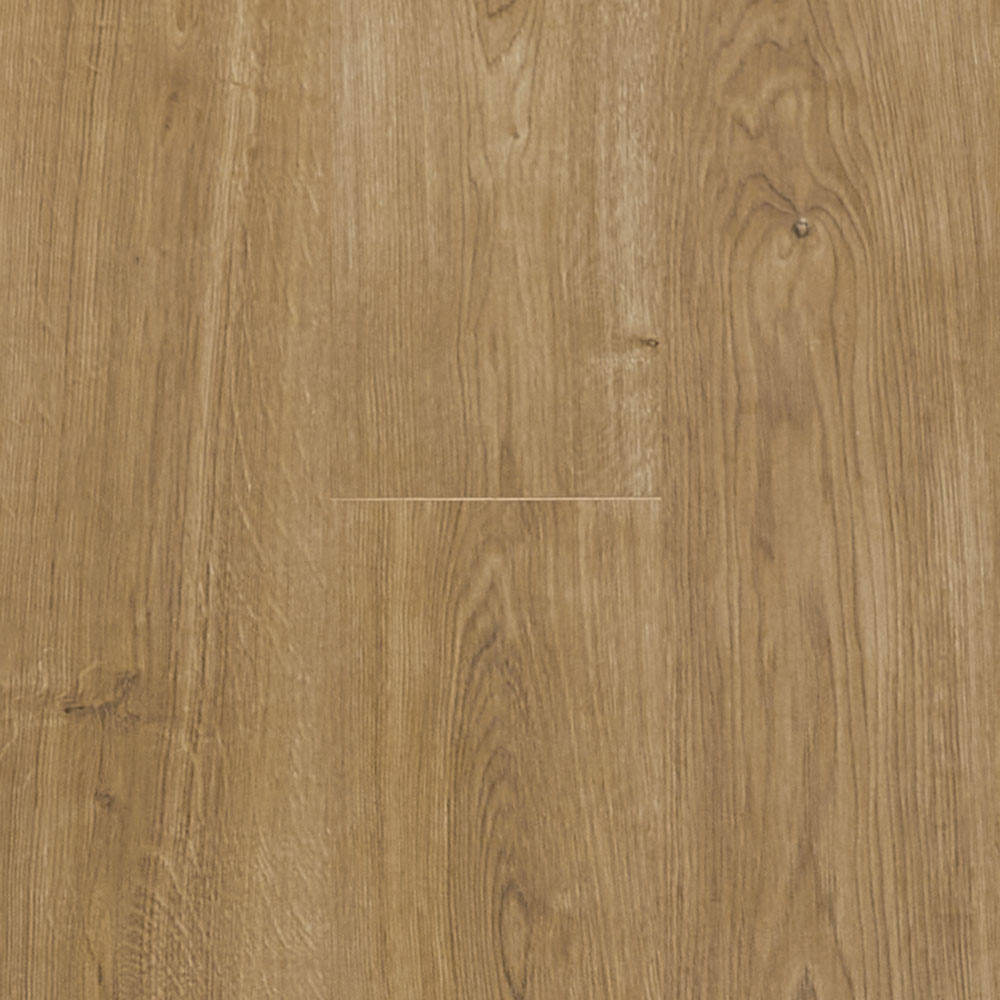
Duravana Hybrid Resilient Flooring– the style I chose is Bay Bridge Oak
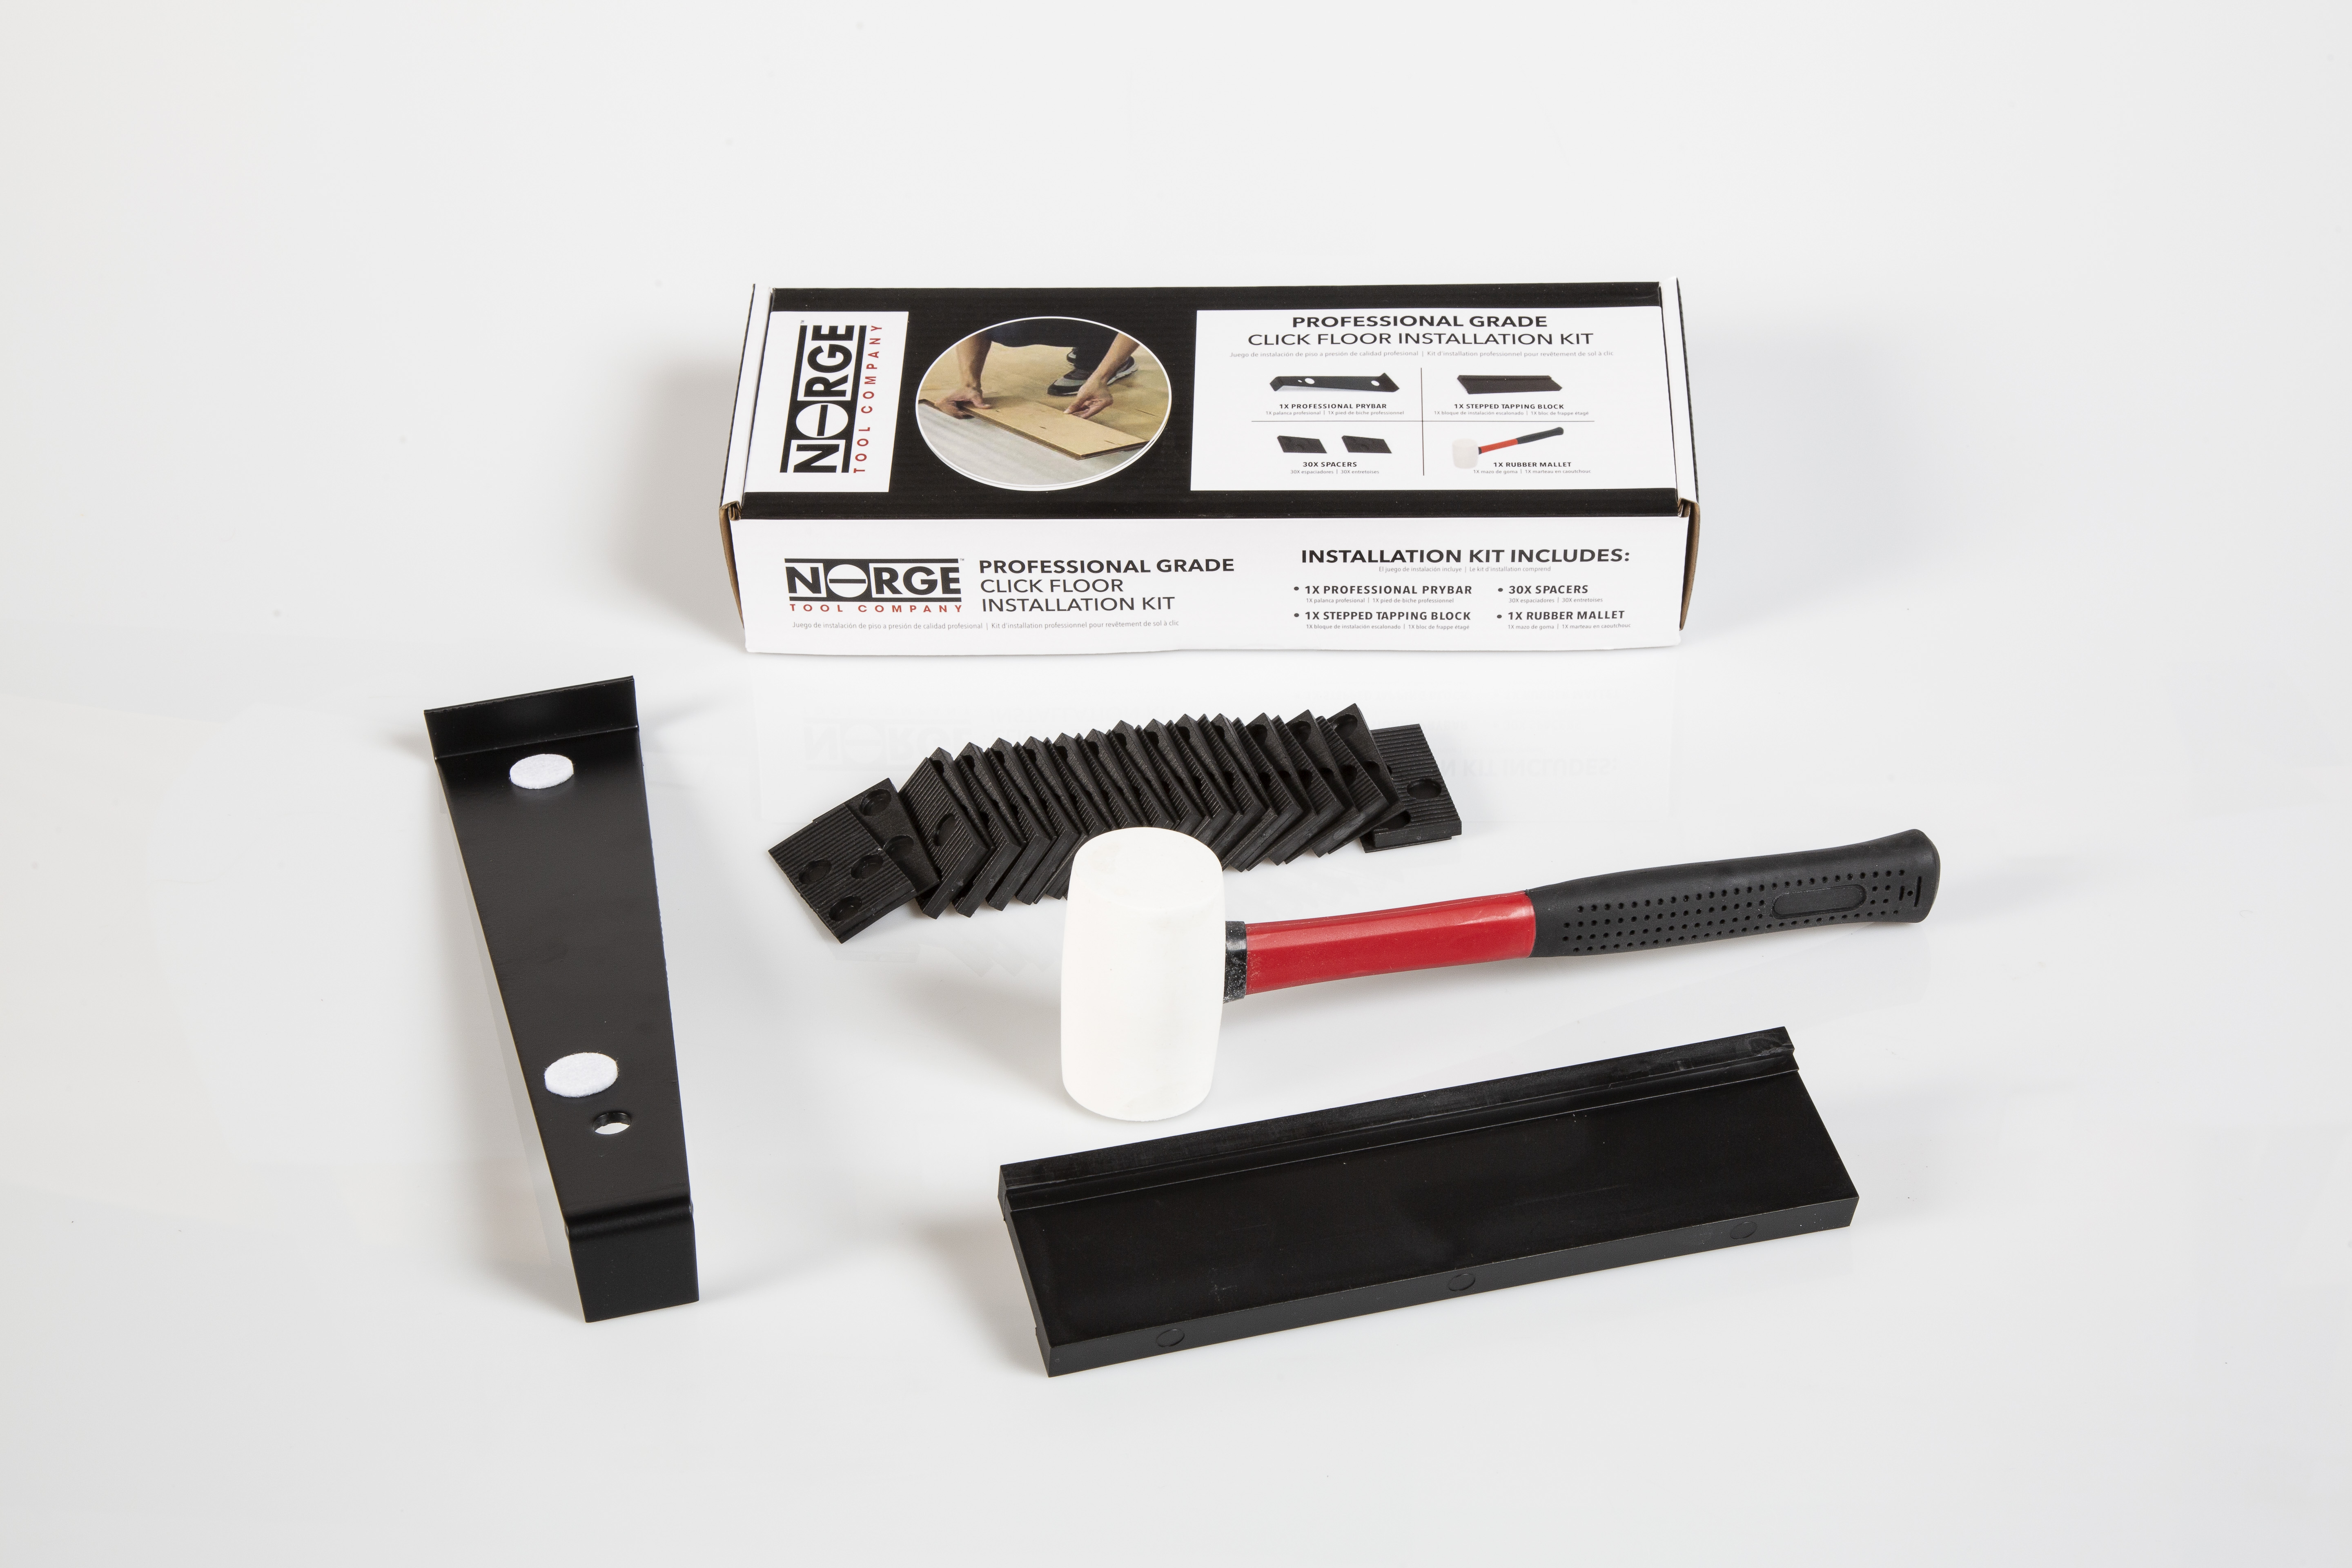
Floor Installation Kit (Includes a tapping block, pull bar, double faced mallet, and expansion joint spacers.)
Table Saw
Miter Saw
[Also used for this particular project]:
Quikrete Setting Cement
Putty Knife
3/4 inch Particle Board
Drill
Screws
Long Pro Pull Bar
How do you get your floors ready for new flooring?
Within 24 hours of signing the papers for our house, we started to tear down walls in some areas and built them back up in others. The flooring on the main level included tile, which we removed using a jack hammer with a floor scraper bit.
The floor needs to be pretty flat, and there was an area near our front door that was several inches taller than the rest of the concrete. We filled the area with quick-setting cement and feathered it out so the grade was subtle. We also filled any large cracks and depressions in the concrete with cement.
One of the Duravana features I love most is the pre-attached pad on each plank, which is one less step to worry about. The only underlayment we did was a plastic sheet to act as a vapor barrier over the exposed concrete.

Another area we had to prep was next to our kitchen. During our initial demo, the flooring in the former kitchen area was different from the hardwood flooring throughout the rest of the floor. So, in that space, we ripped out the laminate flooring and cut ¾-inch particle board, which was as thick as our existing hardwood flooring, then screwed the pieces into the sub floor with 2-inch screws. This created a level plane across the whole space.
The remainder of our flooring was the hardwood, which made it easy since we could just lay the new plank flooring on top, creating a floating floor. We removed all the baseboards because we wanted new baseboards anyways, but also because you typically want to add baseboard after your flooring to cover any gaps between the flooring and the wall. If you’re strongly opposed to removing your baseboards, consider ½” quarter round molding along the bottom of your baseboard.
Is it hard to make sure your new flooring is straight?
Our existing hardwood flooring and walls are super crooked, which makes it difficult to lay flooring straight. We wanted easy and quick installation, and having to check and recheck our work with levels is time-consuming. The solution was to create a fixed, straight point for the first several rows to butt up against.
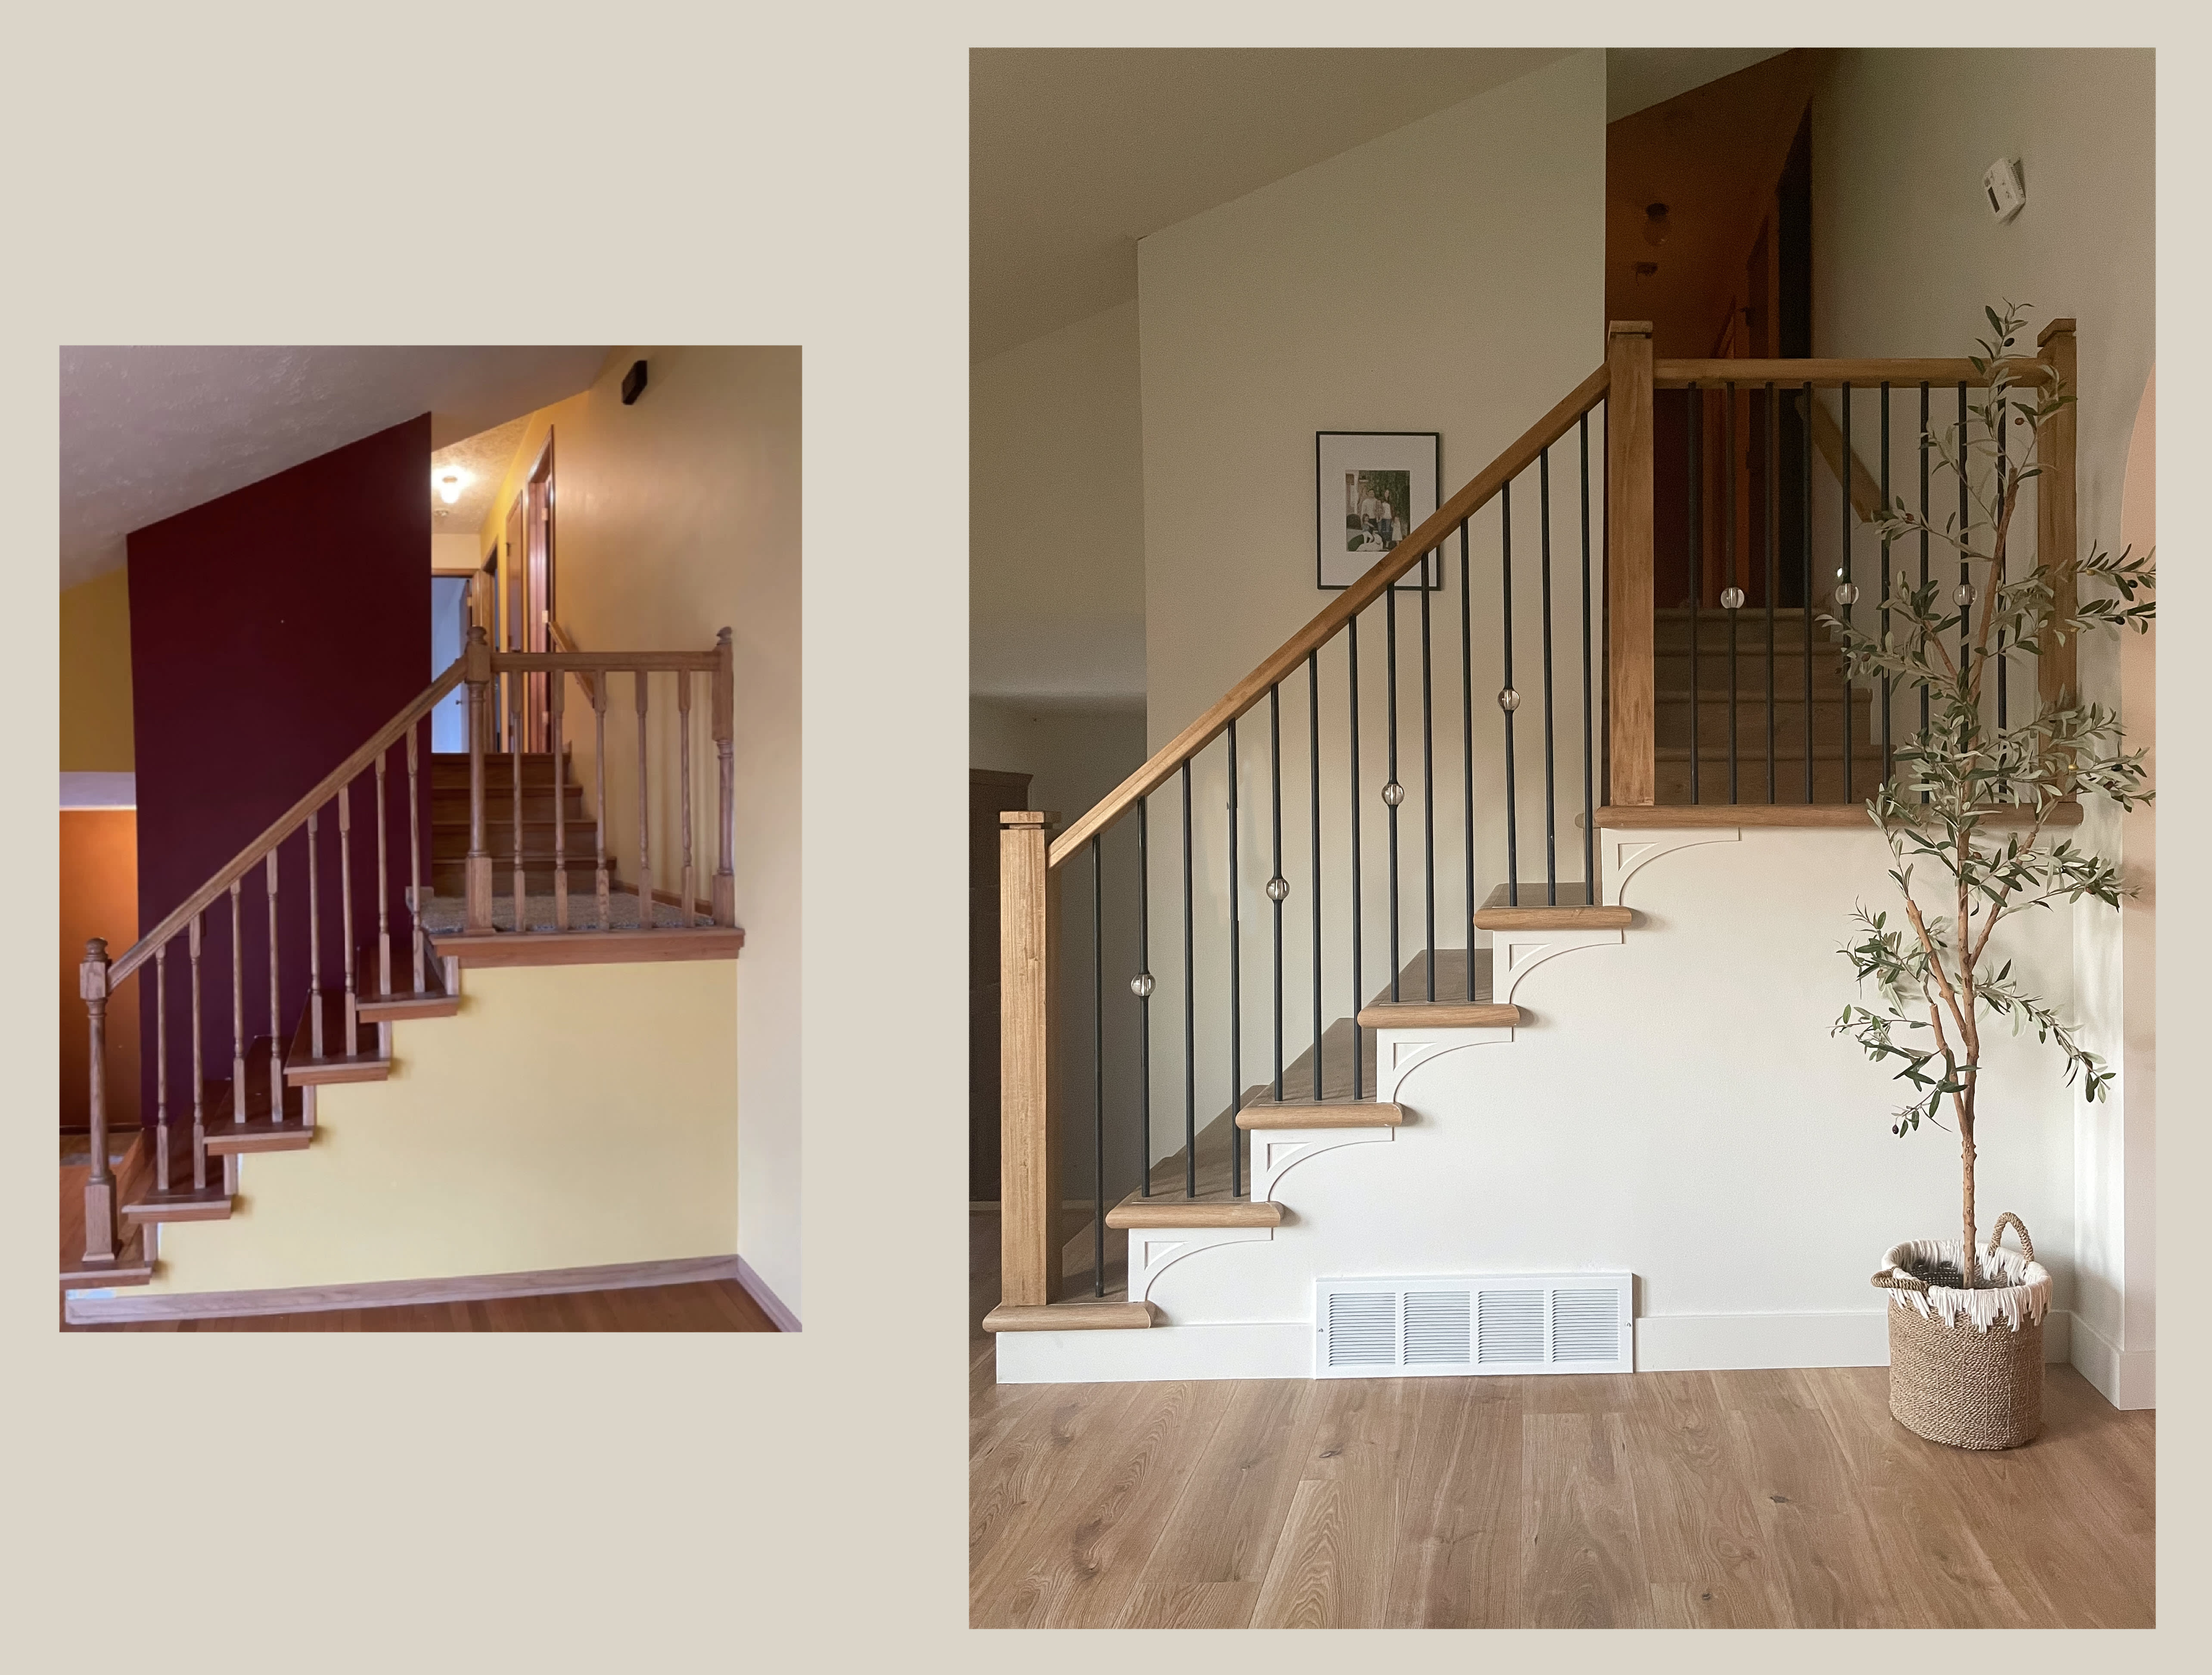
In the future, we plan to install bullnose stair treads (which are also available from LL Flooring in their Duravana line). Bullnose treads need to be glued down, and since we weren't ready to tackle that yet, Grandpa (my husband's dad whom everyone calls Grandpa because we've all forgotten his name) screwed a perfectly straight, temporary piece of wood to act as our "floor straightener". He started by laying one long row of wood flooring to do a test fit.
From there, he laid several more rows, always making sure the first board he laid was butted against the temporary wood.

Which direction should you install your flooring?
We put a lot of thought into this, and in the end, we just flipped a coin. Honestly, it didn't really matter since, no matter what, our new floors would end up butting against the same flooring going in an opposite direction due to the layout of our home. That's what happens when you have several sets of stairs that run in different directions. Our house is pretty much a big square, so we felt like it was a win-win decision.
How do you stagger the seams in a wood floor?
Wood floors look weird if the seams touch each other and run straight across the length of the room. To prevent this, we staggered our pieces by dividing them into thirds. The first plank in the first row was full length, the first plank in the second row was 2/3 the length, and the 1st plank in the 3rd row was 1/3 the length. Rule of thumb is that the end seams be offset by six inches, at least.
When we'd get to the end of the row, we'd cut off the excess and save it for when we needed one that size.
How do you Install Duravana Hybrid Resilient Flooring?
This felt like the easy part, and the instructions are simple.
When attaching one plank to another, hold the plank at an angle and insert it into the plank laying on the floor. Then, press it down until it lies flat. I hit the top a few times with a rubber mallet to make sure it was completely locked into place.
The long side is now locked into place, and the shorter side needs to be as well. I used a floor puller, a mallet, and a tapping block to lock the sides together. The tapping block was just a small piece of leftover plank that fit perfectly into the groove of the flooring. It helps prevent damage caused by the floor puller coming into contact with your new plank.
I placed the tapping block next to the plank, hooked on the end of my floor puller, and then tapped my mallet against the opposite side. This shoved it into the neighboring plank locking it together.
You'll know if you did a good enough job locking the plank flooring into place by checking your seams. Here is Grandpa's seam before and after. He's pretty good at this.
How do you cut wood flooring planks?
Nothing fancy here. Just the basic carpenters square and your choice of cutting tool. I used my miter saw, but you can use a circular saw, or LL Flooring sells an inexpensive floor cutter.
Duravana’s cutting-edge technology allows it to resist some expansion and contraction, but it’s still got wood, and that can swell due to environmental conditions, so when it comes time to cut the end piece of a row, you’ll still need to leave some room for an expansion gap. When we measured to cut the final piece in a row, we set our tapping block up against the wall. This
was helpful for when we installed that piece since now there would be enough room to hook the floor puller underneath so we could tap that last little bit into place.
There were some areas, like the last row against a wall, that required me to trim down the length of the board. My table saw came in handy for this. I also used my jig saw to cut a hole above a floor vent, and then inserted a matching vent cover I also got from LL Flooring in the same color as my flooring (Bay Bridge Oak).
Eventually, I'll seal the crack with some silicone caulk.
Finishing up
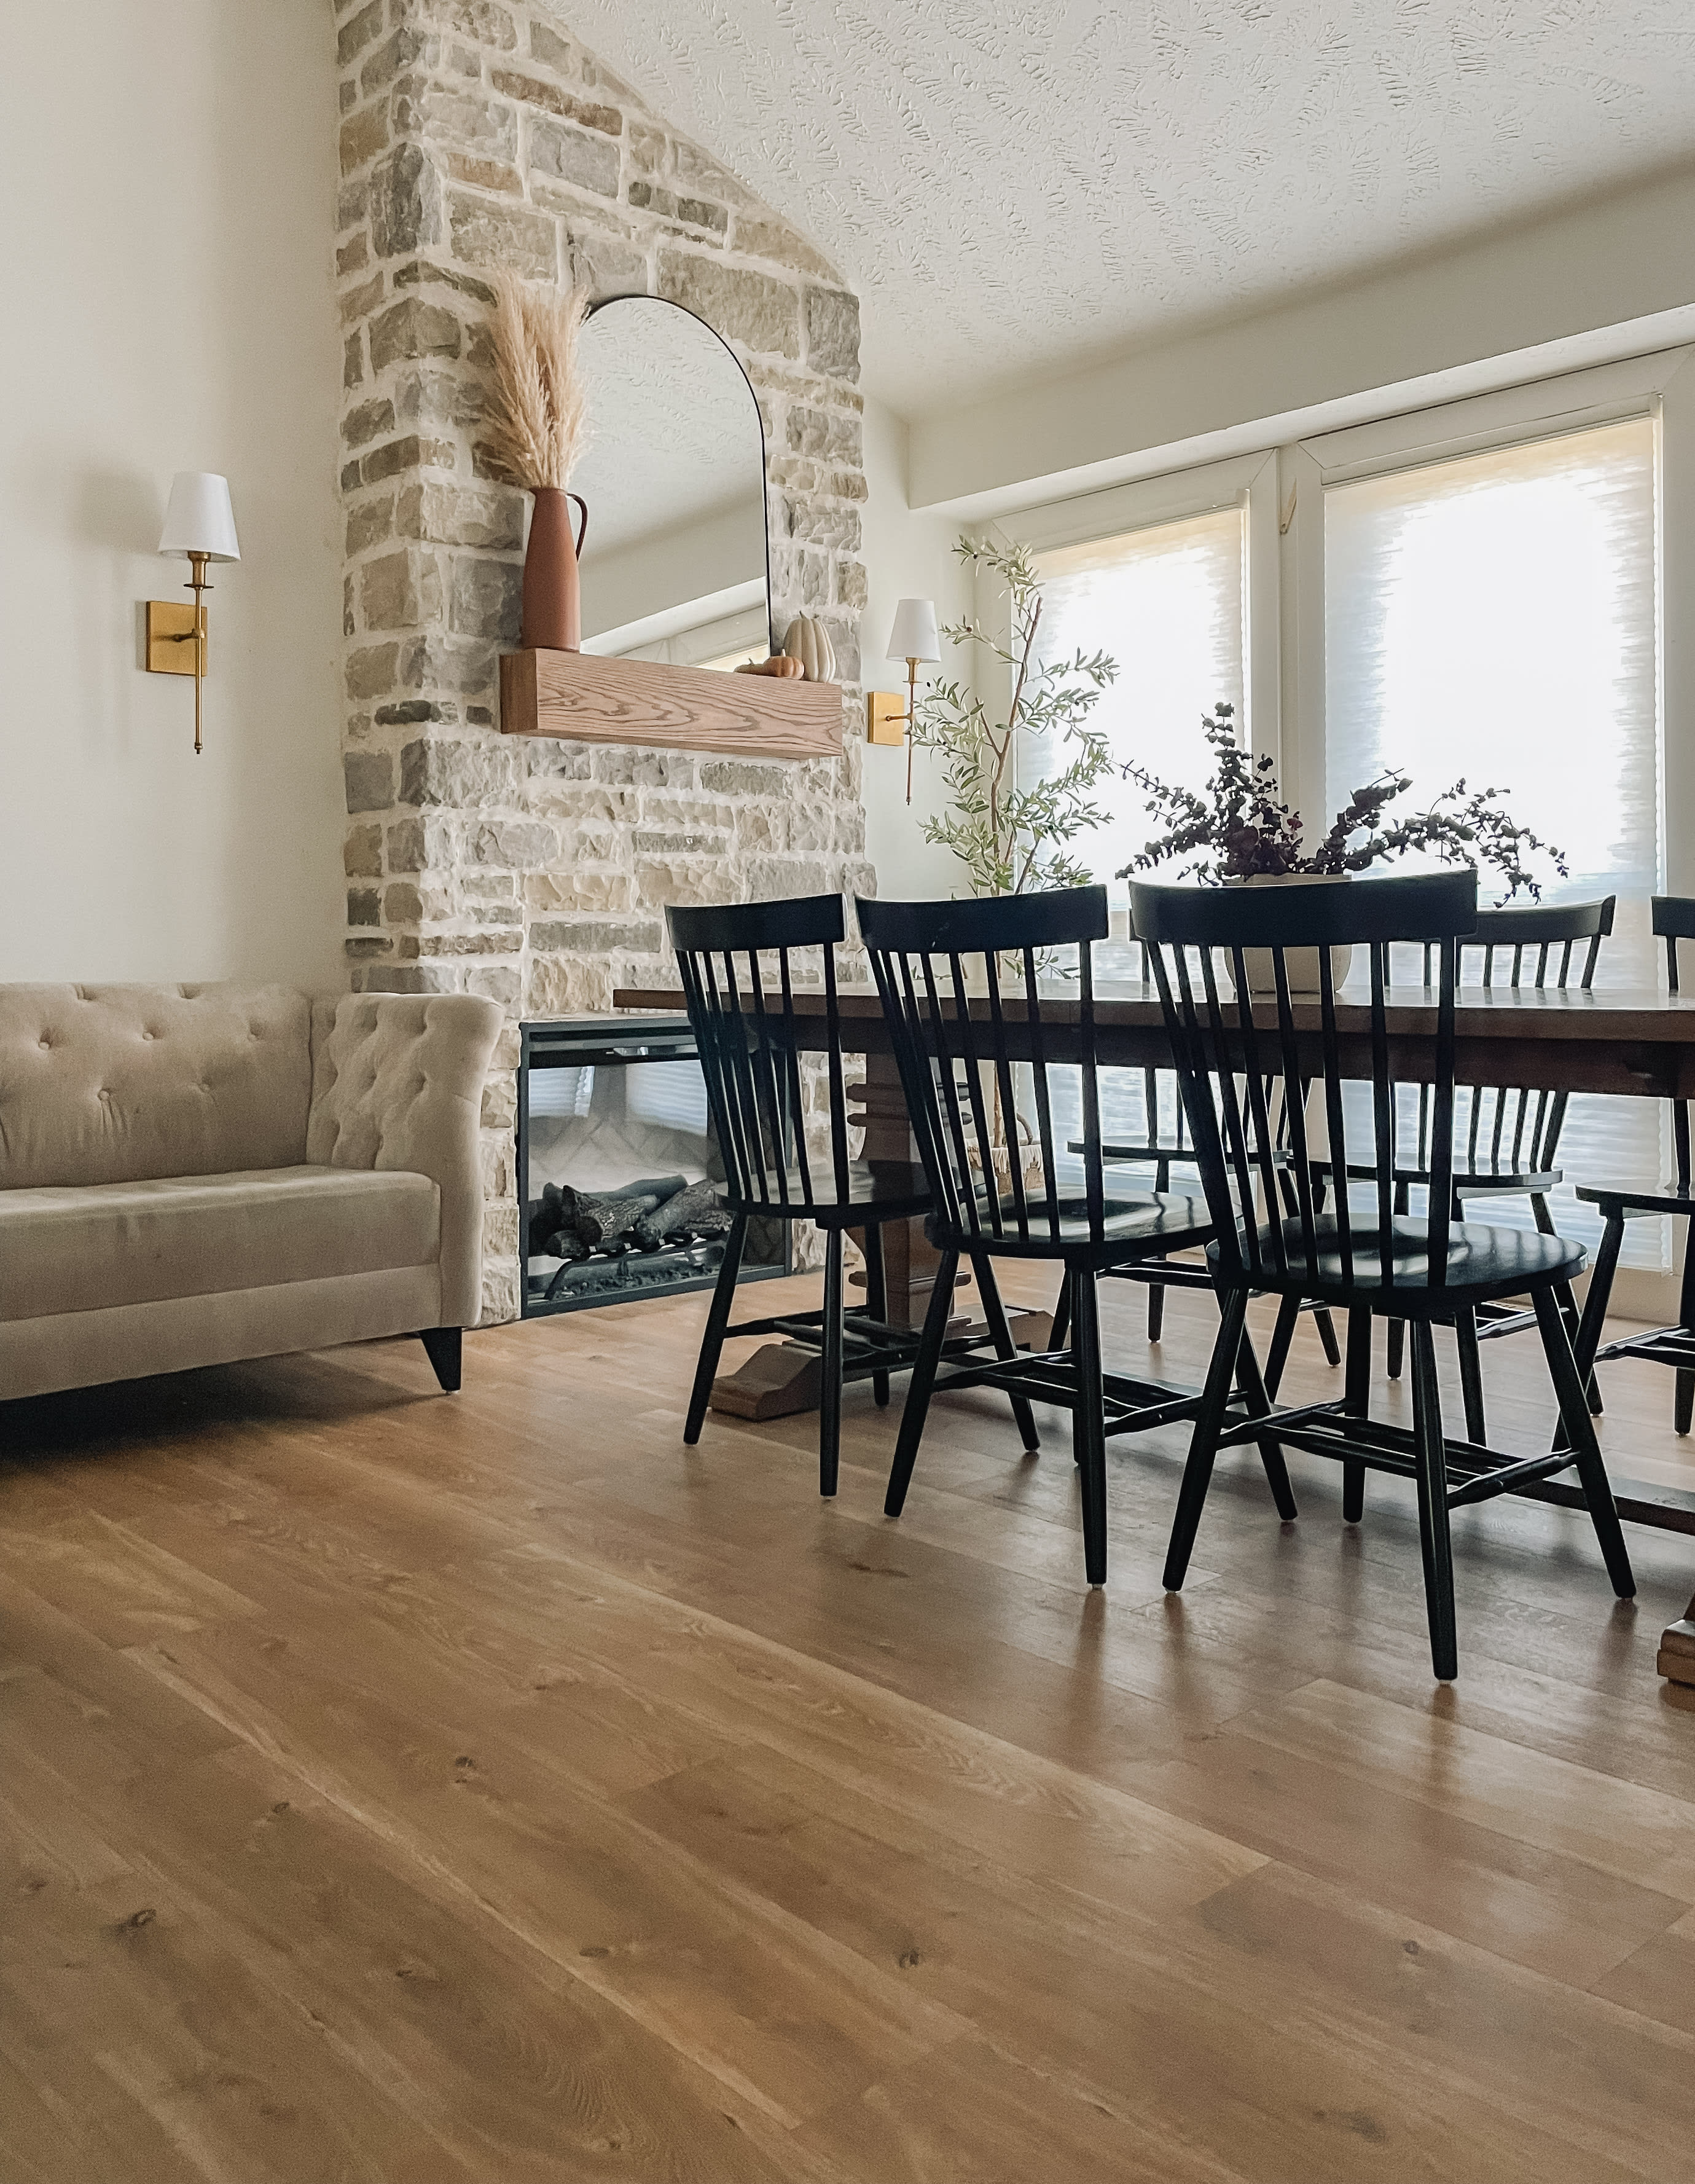
All that’s left is to install new baseboards. Our old baseboards were in bad shape, so we’re planning on installing new ones. When the boards butt up with kitchen cabinets, usually a toe kick is needed. It’s trimmable and conceals all the viewable ends. But, even without our baseboards or toe kicks, look at how beautiful our new floors look!
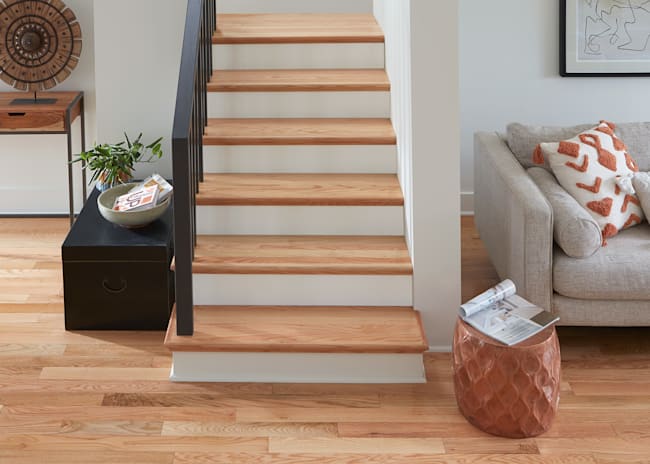
New kitchens and flooring are the two projects that make the biggest impact in a house. I had no idea how dark my previous flooring was because the new flooring instantly brightened my house. Another awesome bonus is that the color and pattern hides dirt so well. Well, I guess that could be considered not awesome, but for me, it's awesome. Because of how wide the planks are, my living area feels more modern, which is a hard thing to do in the style of house have.
My floor looks like real, textured wood, and it will take me years to notice a matching pattern. Thank you, LL Flooring, for spending the time researching and developing these new types of Hybrid Resilient floors!
Leave a comment if you have any questions or reviews about the Duravana line of flooring. I'm here to help!
-Crystel Montenegro
https://crystelmontenegrohome.com/
Would you like to try out the products mentioned in this article? Add 4 Free Samples to your cart and have them shipped right to you, no credit card needed.
Follow LLStyle on Instagram & Pinterest. Post or share photos and tag @LLFlooringOfficial.
Learn about home improvement and design with fun and informative videos. Subscribe to the LL Flooring YouTube Channel. Leave comments or ideas that helped you and join the community.