
How to Step Up Your Staircase with Hardwood Risers & Treads
Beyond their functionality, stairs often present an impactful first impression of your space.
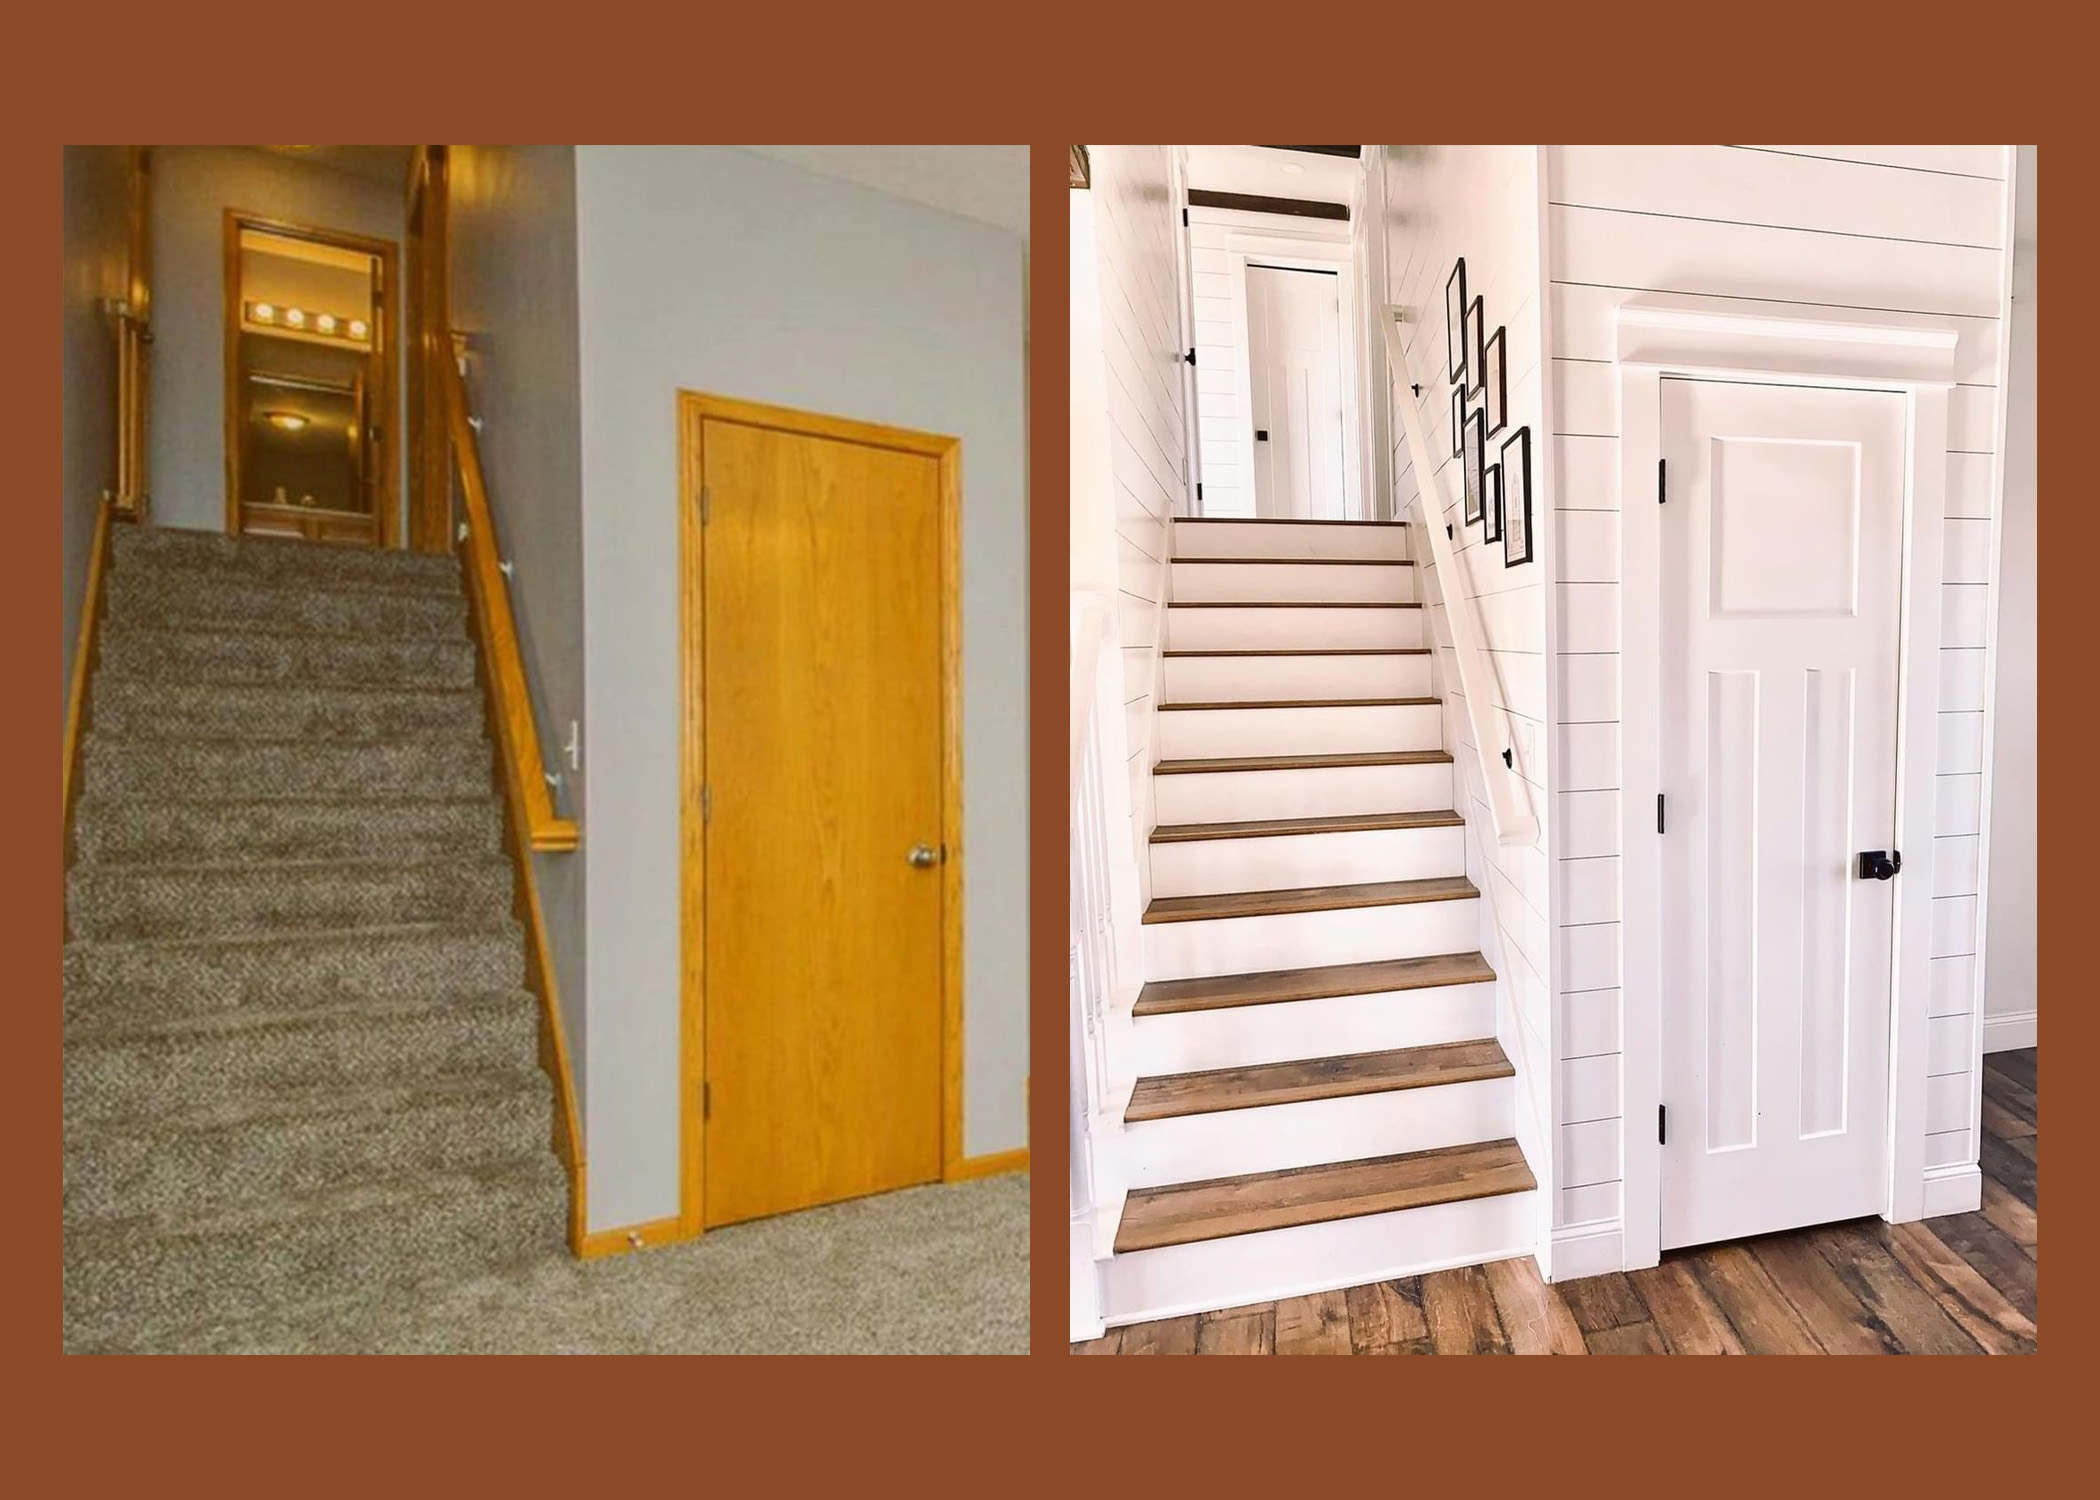
Staircases are an often-overlooked part of the home, serving purely as a functional means of getting from one level to another. But, they’re typically one of the first things you see when you step in the front door, so beyond their functionality, they can create an impactful first impression of your space, and set the scene for the rest of the interior.
So, if you really want to make your stairs shine with a premium hardwood, or the authentic wood appeal of laminate, vinyl, or hybrid resilient stairs - we’ve got some expert tips and directions for updating your staircase. These simple steps (see what we did there?) will ensure ample resistance to wear-and-tear and give your home an instant facelift in the process.
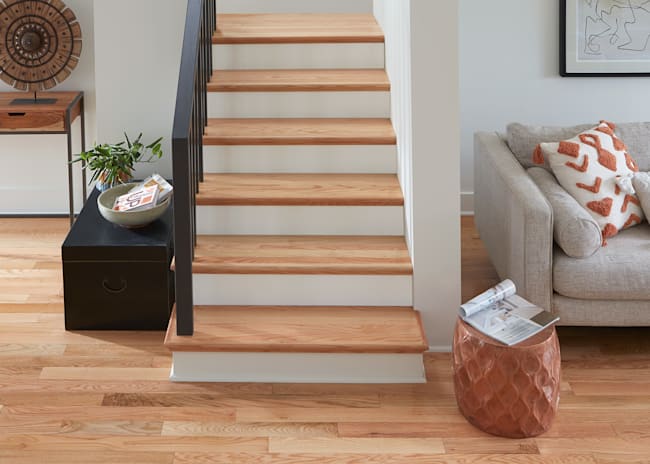
with Dream Home XD Antique Farmhouse Hickory Laminate Stair Treads.
The easiest way to update your staircase is using retro-fit treads and risers. Retro-fit means they are designed to fit on the existing staircase (you’re not rebuilding it).
To help you visualize, we’ve also got helpful insights and video from our LA-based contractor and home improvement TV host, Josh Temple.
Prep Your Space
Before you start installing, you need to prep your stairs—if they were previously carpeted, this would include first removing the carpet, scraping off any remaining adhesive, hammering in any stray nails, and vacuuming thoroughly to ensure your surfaces are clean.
This is also the time to check for squeaks and creaks! To fix a squeak on a tread, simply drill in a screw next to it and that should dampen the noise.
Do you like ideas and how-to videos about design and decor on YouTube? SUBSCRIBE to the LL Flooring YouTube Channel and get notified about new videos!
You’re almost ready to start the installation process; just a few steps left to go (last pun, we swear)! Next, you want to make sure you’ve squared off all of your risers and treads, eliminating any overhang of the treads. (There are multiple ways to do this. Refer to the complete instructions found on each product page.)
Now, if your stairs have spindles, don’t forget to remove each spindle and refit them with the new treads. A key tip here is to make a template that marks where the spindle will be going in the new treads.
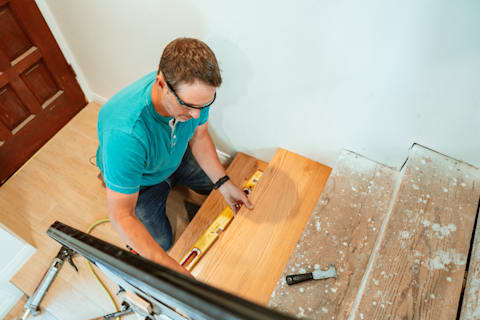
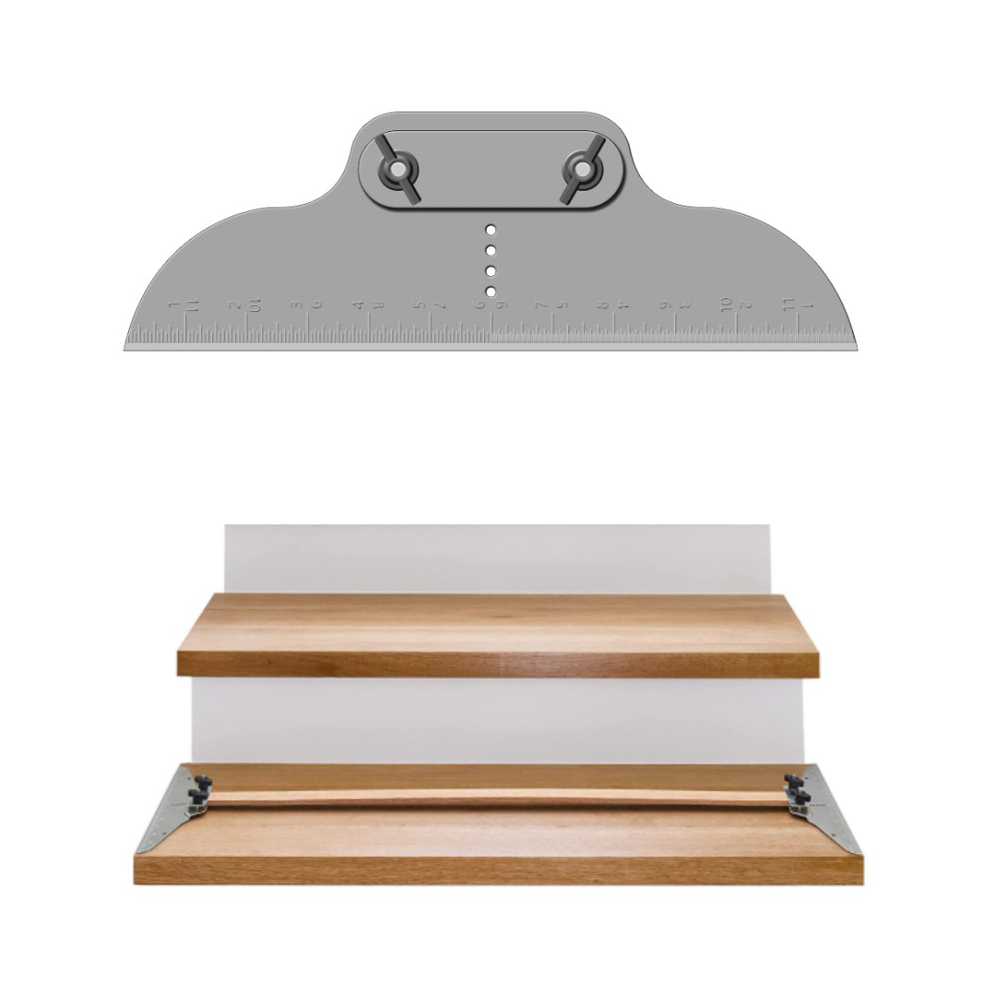
Cutting Your Risers and Treads
It’s always important to measure twice (at least!) and cut once. With stairs, we can’t emphasize enough how important it is to cut it right.
Pay close attention to this next section. Because each individual tread will be slightly different, it is important to measure each one correctly before making cuts.
A tool that makes this tremendously easier is the Tread Tool from LL Flooring. This tool allows you to properly measure the length and angle of each riser and tread. This is important because while you may think your walls going up the staircase are a perfect 90-degrees, it’s probably not. The tread tool helps you determine the proper angle for your cut so can have the perfect fit on each tread and riser.
The Lowdown on The Glue-Down
As you begin to install, the general tip is always start the work from the bottom and move your way up.
For both your risers and treads you’ll want to glue them down—but before you slap the glue on, always dry-fit it each piece to first to ensure the fit is right fit. Once you’re ready to glue, make sure to avoid a water-based adhesive which could cause the treads to warp.
When gluing, be sure to fully cover your board and then firmly apply. For treads, it is recommended to then put a nail at the very back of the tread to further secure the tread—with the nail in the back it will be covered by the next riser.
Once everything is glued and nailed down, give it the final touch with caulk around the edges for a smooth, flawless finish.
Check out LL Flooring’s collection of stairs treads, risers, noses, and other tools to help you step up your staircase.
Got any tips for installing hardwood on your stairs? Tag us at #LLStyle!
See below for the full video, and don’t forget to SUBSCRIBE to the LL Flooring YouTube Channel, to leave comments, ask questions, and join the community!
Related Articles