

Vinyl Click Flooring Installation Guide
How to prepare and complete your vinyl plank flooring installation.
Owner/Installer Responsibility
- Prior to installing a single board, you or the installer must determine that the job-site environment and the sub-surfaces meet the requirements set forth in this installation guide.
- Your installation area and subfloor must be clean, dry, stiff, and flat within industry standards.
- Inspect All Planks for Visible Defects: Planks installed with visible defects are not covered under this warranty. Accordingly, before installation, you and the installer should examine all planks to ensure they are satisfactory. If any planks are unacceptable due to color, finish, milling or any other reason, it is up to you to determine to use them, hide them in areas like closets, trim off the imperfection, or not install them at all.
- Add at least 5% to 10% more material for waste.
- Plan on being present during installation to ensure that all required procedures are completed and planks with visible defects are not installed.
- If quality issues are suspected before or during installation, immediately contact the store where your floor was purchased or use our online chat request a contact to help.
- Use of stain, filler or putty stick for touch-up is considered normal practice.
- Follow the Vinyl Click Installation and Care Instructions.
Applications
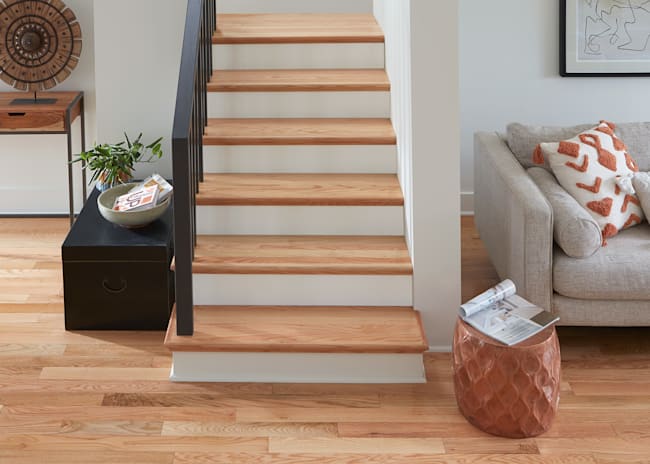
Vinyl click flooring can be installed on all grade levels of the home that are temperature controlled. It can be installed using the floating installation method or glue down installation method only.
Jobsite Conditions
- The building should be enclosed with all doors and windows in place.
- Crawlspaces, basements, and garages should be dry and well ventilated.
- Crawlspaces must be a minimum 18" from the bottom of the floor joist to the ground. Crawlspaces must have a minimum 6mil thick polyethylene film covering the entire crawlspace ground.
- All gutters should be in place and functioning properly. Yard grading should be sloped to run water away from the home foundation.
- HVAC systems should be operational and have temperature maintained between 65F to 80F for at least a week prior to flooring being delivered.
Acclimation/Storage
- Lay boxes flat on the subfloor, no more than six cartons high at all times. Improper storage can result in bowing.
- Storage area and Job site should be climate-controlled with temperatures of65°F-80°F.
- Acclimate the flooring in the boxes for at least 48hrs. Keep away from direct sunlight, heat sources, and in-floor vents during acclimation.
Caution
- Do not install in wet areas like patios and showers, or exterior areas
- Do not install on walls, ceilings, in boats, or other moving vehicles
- Do not install under kitchen cabinets as a floating floor
Planning
- Permanent HVAC system must be in operation during and after installation for the life of the flooring. Make sure the temperature in the home is maintained between 65F to 80F year round.
- Windows and sliding glass doors should have proper cover to prevent direct sunlight to the flooring in floating applications. Extreme heat from sunlight can cause edge curling or seam peaking. A glue down installation method works best in areas with direct sunlight exposure to prevent curling and seam peaking.
- Install this floor after all other construction work has been completed.
- When installing over concrete several days will be needed to conduct the proper concrete moisture testing.
- For best look mix vinyl planks and pull from several boxes at a time when installing to have a random variety of plank lengths.
- Always install in good lighting so visual defects can clearly be seen.
- When gluing this product, do not move furniture back onto the flooring until the adhesive has cured. Check with the adhesive manufacture for cure times.
- It is recommended to have an additional box left over after installation, to be used for repairs if needed.
- When moving furniture and heavy equipment on the flooring use luan board or plywood to protect the panels from rolling wheels. Do not use cardboard.
- Make sure to add moldings to cover the expansion space between the flooring and wall, and when transitioning to other existing floors.
WOOD/CONCRETE SUBFLOOR REQUIREMENTS:
Approved Wood subfloors:
- Note that joist spacing determines minimum subfloor thickness.
- Joist spacing 16" on center (OC) Plywood: Minimum of (5/8") Oriented Strand Board (OSB): Minimum (3/4", 23/32")
- Joist spacing 16" up to 19.2" (OC) Plywood: Minimum of (3/4", 23/32") Oriented Strand Board (OSB): Minimum of (3/4", 23/32")
- Joist spacing over 19.2"up to maximum 24" (OC) Plywood: Minimum of (7/8") Oriented Strand Board (OSB): Minimum of (1")
CLEAN: All wood and concrete subfloors must be swept clean or vacuumed to remove dust and debris. For glue down installations remove all contaminates like paint, old adhesives, sealers, and dry wall mud that could affect the adhesive bond.
FLAT: All wood and concrete subfloors must be flat within 1/8" over a 6' span, or 3/16" over a 10' span. All areas of the subfloor must be check prior to installation. High spots can be sanded or grinded down and low spots fill with appropriate patching compounds. Set protruding fasteners flush into the subfloor. Never sand and grind materials covered with lead paint, or containing asbestos. Follow local building codes for proper removal practices of asbestos and lead paints.
DRY: Wood subfloors should be dry. The moisture in wood subfloors should not exceed 12%. If high moisture is present stop installation until the moisture source has been corrected.
*Concrete subfloors must be fully cured for at least 60 days. Concrete must be tested for moisture by conducting a Calcium Chloride test (ASTM F 1869) or Relative Humidity In-Situ Probe test (ASTM F 2170). Calcium Chloride test results cannot exceed 3lbs per 1000sqft in 24hrs. Relative Humidity In-Situ probe test should not exceed 75%.
Existing floors
- This flooring can be floated over existing clean, flat, dry, and well bonded/secured tile flooring, vinyl flooring, and hardwood flooring.
- This flooring can only be glued down to existing properly prepped existing flooring that has been approved by the adhesive manufacture.
- Do not install this flooring over existing carpet flooring, cushioned vinyl flooring, or existing floating wood and vinyl floors
Tools
Tape Measure -L square - Utility Knife - Safety Glasses -broom/vacuum, 1/2" Spacers
Radiant Heat
- This flooring is suitable for installation over Radiant heating systems provided that the heating element is not in direct contact with the Resilient.
- New heating systems should be running two weeks before installation to remove residual moisture from the subfloor.
- Lower temperature of heating system to 60°F for one week prior to installation.
- Gradually increase temperature in increments of 10° per day to avoid "shock" to resilient flooring.
- Surface temperature should not exceed or sustain 80°F
- Make sure adhesive are compatible with radiant heat systems, and follow adhesive manufacture recommendations for proper installation over radiant heat systems.
Floating Installation Method:
Planning:
Determine in which direction the planks will be installed. To make the room appear larger or if installing in very small rooms or hallways, it is preferable to lay the planks parallel to the longest room dimension. Use a jamb saw to undercut door casings to allow the flooring to slide freely underneath.
Approved Underlayment Padding:
No underlayment padding is required for most vinyl plank products, but quality underlayments can be used to help smooth out minor subfloor irregularities, add sound control, add moisture reduction, and provide additional value.
Expansion Space/T-molding Breaks:
A minimum 1/2" expansion space must be place between the flooring and all walls and fixed objects. A T-molding must be installed to break up continuous runs exceeding 30' in width and in length. Gapping and buckling can develop if expansion space, t-moldings, and temperature requirements are not followed. For continuous runs of flooring exceeding 30' in length or width the flooring should be glued down.
BOARD PLACEMENTS
Below are two common options for board placements and best overall appearance
- Start with a full plank for the first row, a 1/2 plank for the second row and a 1/3 plank for the third row, repeat process until completion.
- or start with a full plank for the first row, a 1/2 plank for the second row and a full plank for the third row, repeat process until completion
INSTALLING PLANKS
The tongue side of the plank shall face the starting wall, grove side facing outwards. Begin laying planks on the left side of the starting wall and work to the right side.
THE FIRST ROW
-
Start in the left hand corner placing /" spacers between the wall and the flooring. Install the butt ends of the next plank into the end of the previous plank. Continue this until row is complete.
- The last plank in the row needs to be cut to fit while still leaving a /" gap between the last plank in each row and the wall. The planks that begin and end a row should be at least 6' long. The remainder of the plank cut to end the first row and be used to start the second row.
SECOND AND CONSECUTIVE ROWS
- Position the first plank of the second row with short end-side against the wall and the long side along the planks of the first row. Remember to place a 1/2" spacer between the wall and the plank. Fit the long side of the plank into the first row. Insert the tongue side into the groove side at approximately a 45° angle until planks lock together. Gradually lower the plank down flat until the joint closes.
- Install the second plank in the second row by inserting the short side tongue into the previously installed first plank short side groove.
- Align the plank so the long side tongue tip is positioned just over the groove lip of the plank in the first row.
- Using gentle force and at a 20-30 degree angle, push the long side tongue into the groove of the adjoining plank by sliding along the short side seam. You may need to lift the plank to the left of it slightly to allow for the "sliding" action. Repeat steps 1 to 4 until come to the last row.
LAST ROW
The last row of planks may need to be cut lengthwise to obtain the proper width. The width of the last row shall not be less than 2". Align a plank that has been cut to the correct length exactly over the first plank in the previous row. Lay a scrap plank over top of the plank to be cut and mark the distance with a pencil. Cut each plank accordingly. When performing this step, remember to allow for proper spacing between the wall and the last row of planks.
CUT AROUND PIPES
Glue Down Installation Method:
- When gluing down the flooring, install the flooring the same way as you would using the floating installation method. The only difference is that adhesive will be applied to the subfloor, and the flooring will be laid into the adhesive bonding it to the subfloor. Always check the adhesive manufactures guidelines on proper subfloor prep, moisture testing, approved substrates, trowel sizes, cure times, and coverage. A moisture barrier is required over all concrete subfloors.
- Recommended Adhesives. Technical Data Sheets for these adhesives can be found on the adhesive manufactures website, or on the individual product pages of llflooring.com
- Technical data sheets provide the guidelines for approved subfloors, approved floors, subfloor prep, cure times, trowel sizes among other information.
- Expansion Space: A minimum 1/2" expansion space is required around all fixed objects and walls. T-molding expansion breaks are not required with glue down installation methods.
- Glue down Install: Start the installation parallel to the longest exterior wall in the room. Apply adhesive by following the adhesive manufactures guidelines, leaving a min. 1/2" expansion gap at all walls. A laser level or string line can be used to make sure the first row is straight. Allow the first row to set up before installing additional rows. This helps prevent the first row from moving as the next rows are installed. Discard badly bowed or warped planks. Clean up any glue residue that gets on the finish right away using the adhesive manufactures recommended remover. Avoid walking on the flooring and placing furniture onto the flooring until the adhesive has time to cure.
AFTER INSTALLATION & MAINTENANCE
- Sweep up all trash and debris
- Save extra material and store it in a climate controlled space.
- Save one box label in case future product is needed for repairs.
- Install trim, molding, and transition strips (VIDEO), found at https://www.llflooring.com/c/accessories-molding-trim-baseboards/ for available trim and instructions.
- When moving furniture back on the flooring make sure to properly protect the flooring. It's best not to slide furniture in place.
- Use felt protectors on furniture legs
- Clean floor with Bellawood floor cleaner.
- Avoid sun exposure to the flooring for long periods of time. Close blinds and drapes during peak sunlight hours. Excessive heat can cause expansion and warping of the product.
- Caster wheels should have wide rubber casters. Protective mats are required under rolling chairs. Do not use plastic mats. Use non -staining mats.
- Use walk off mats and entrance doors to prevent grit and dirt from being tracked on the floor.
- Sweep or vacuum the floor regularly. Use vacuum designed for hard surface floors that do not have beater bar. The beater bar should be turned off.
- Do not use polishes, waxes, harsh chemicals or abrasive cleaners on this floor.
- Wipe up spills immediately with a damp cloth.

This Vinyl Plank Flooring Cutter can save significant time by allowing you to cut planks right where you are installing, also eliminates noise and reduces mess associated with a power saw.