
Vinyl Flooring Installation Guide
NOTE: This a general guide and does not replace specific warranty, installation, and care guidelines.
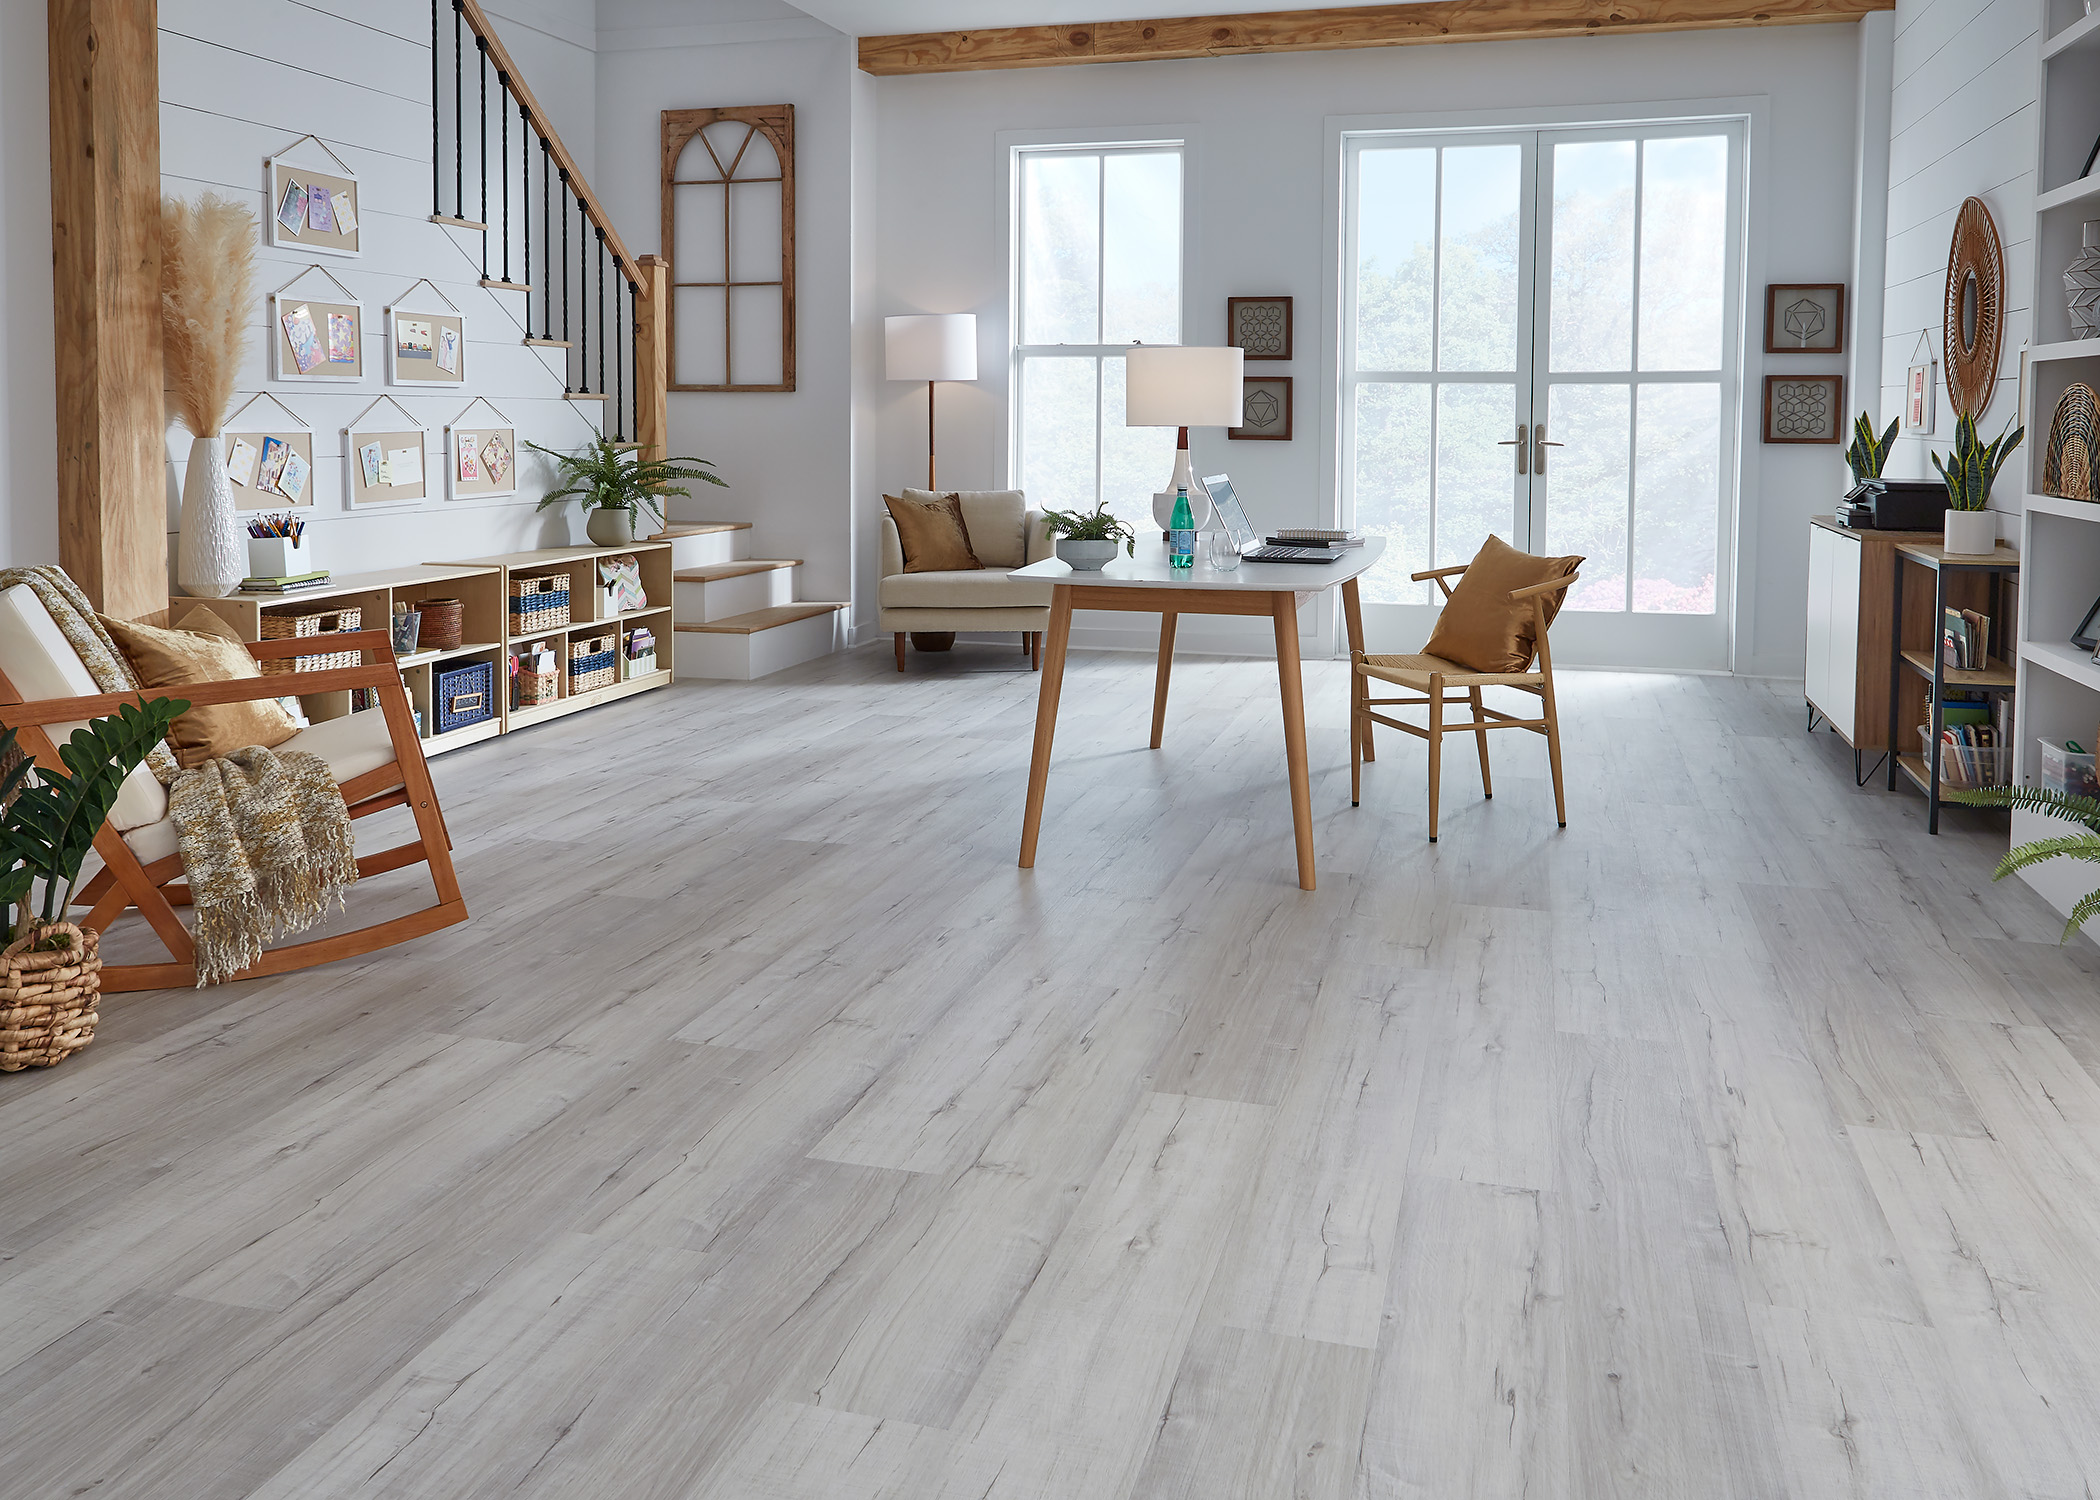
Vinyl Flooring 101
One of the key benefits of vinyl flooring is how even inexperienced do-it-yourselfers can install it and achieve a professional look. But with the many types of vinyl available and their different installation methods, it's always helpful to refresh your memory on how to install vinyl plank flooring. We've put together this guide to walk you through the essentials.
Acclimation Is Essential
Before installation of vinyl plank flooring, it's important to make sure your flooring is acclimated to your home's temperature range. Acclimation simply means allowing your flooring to adjust to the temperature of your home. Leave your newly arrived flooring uninstalled in your home for a period of time. If you try to install your flooring before it acclimates, it can buckle or warp, because planks and tiles can expand and contract as they react to the ambient temperatures of their new environment.
The length of time necessary for acclimation varies by type of vinyl flooring and by installation method. Generally leave the uninstalled planks for 24 to 48 hours, at around 60 – 80 degrees F. Please check individual products warranty installation and care guide for your product of choice.
Once your planks and tiles have been properly acclimated, they're ready to install!
Plan for Success
Vinyl flooring can be installed on any level of your hour home, including upstairs and basements. You can lay it down either on top of your home's subfloor or directly on top of certain pre-existing floors. The pre-existing floor must have a hard surface (carpet or other cushioned flooring must be removed). It also must be mechanically stable, such as being glued or nailed to the subfloor.
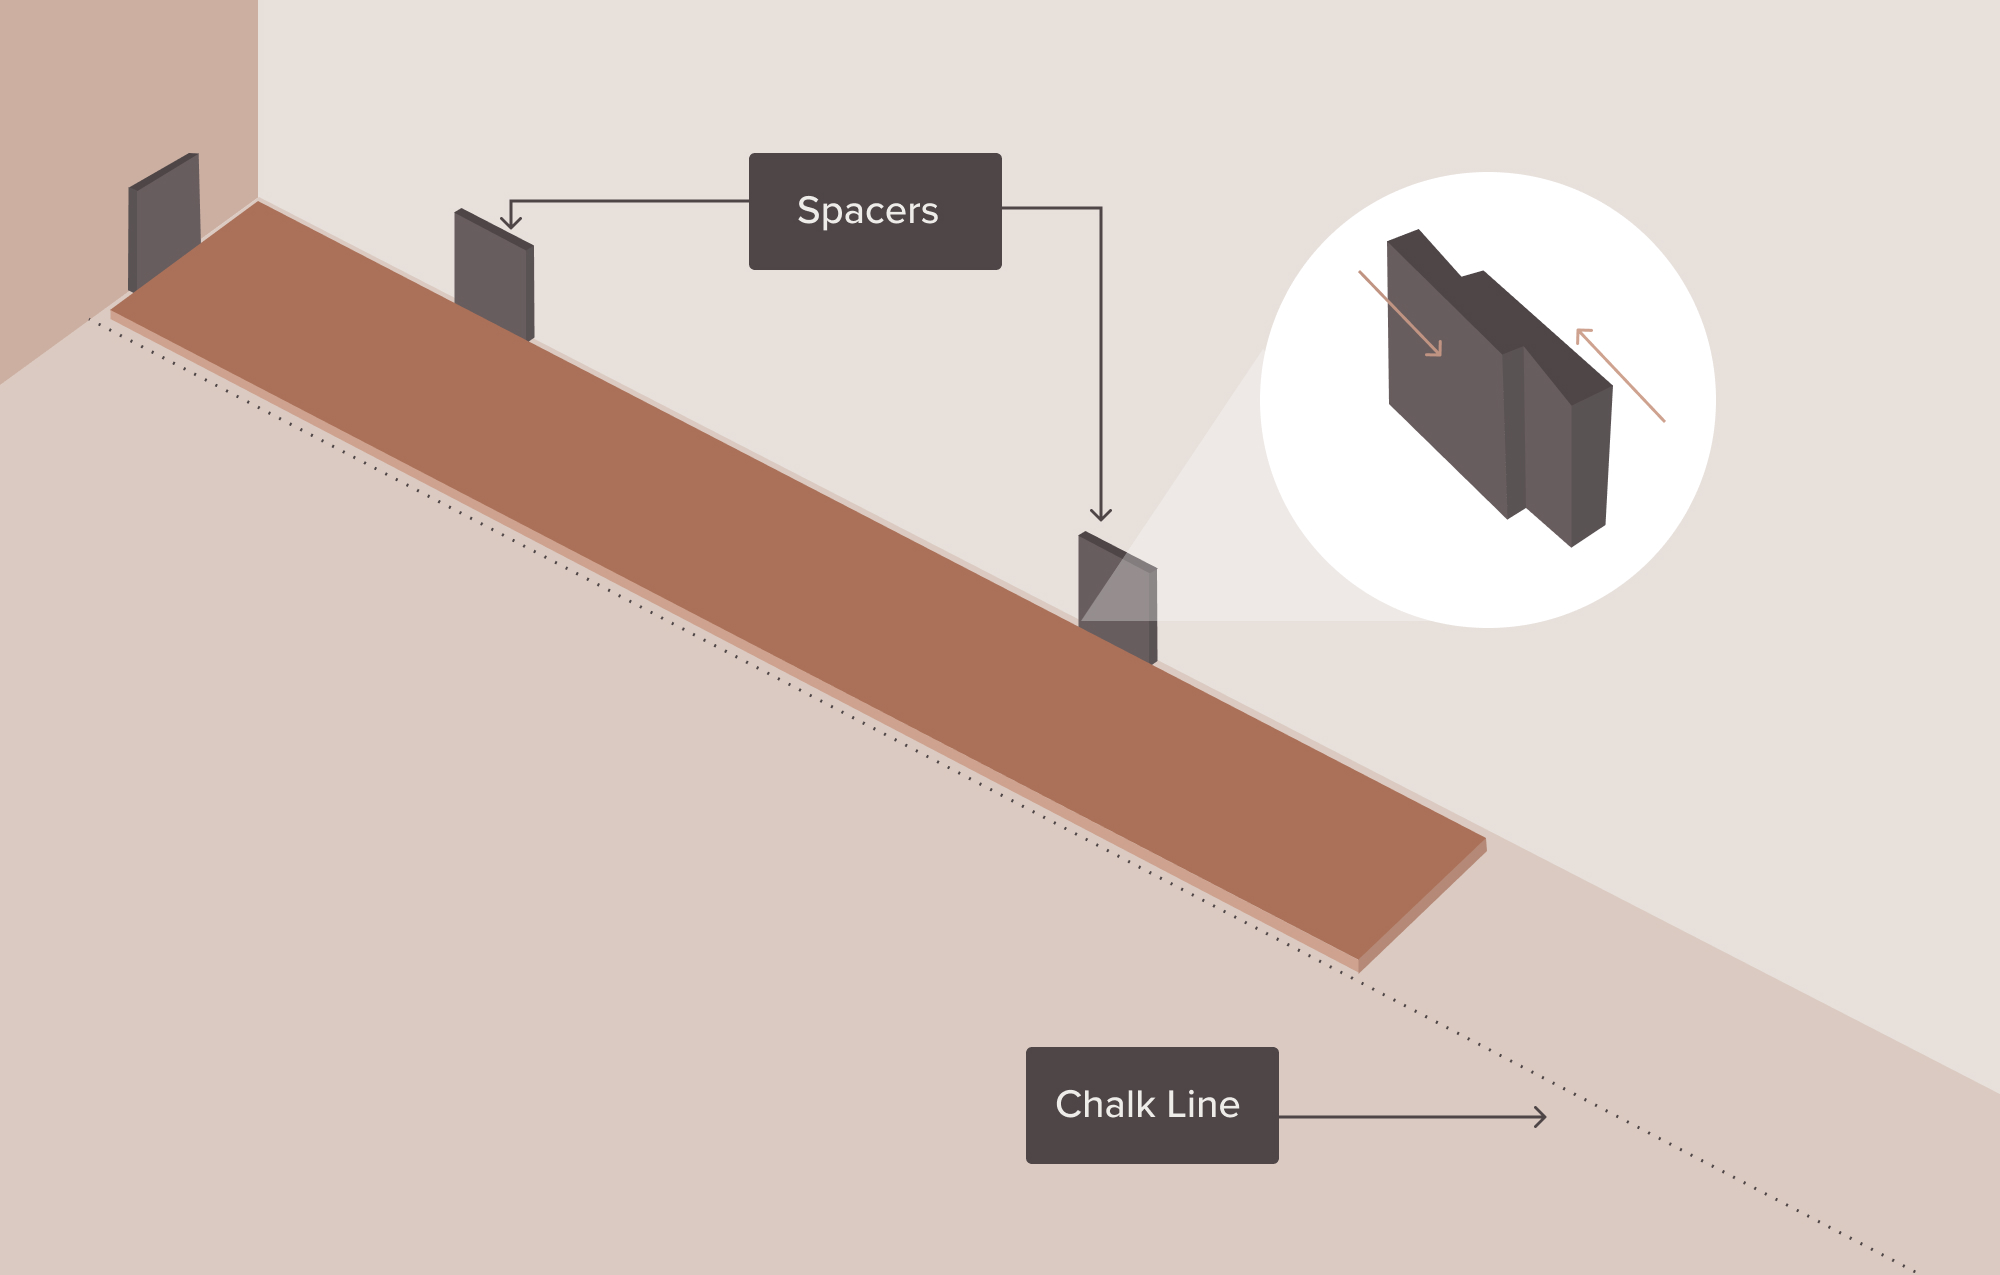
Before you start laying down planks, make sure you're prepped. Generally, you want to be sure to leave a 1/2-inch gap between walls and floor all around the perimeter and around any fixed objects. This gives room for the boards to expand in response to environmental factors, without causing buckling or warping. If your room is wider or the temperature has a wider fluctuation check the warranty installation and care guide for more information of suitable expansion and contraction gaps. Molding along your walls and transitions is effective at covering the expansion gap and creating a contraction overlay while adding additional character and appeal.
Additionally, install expansion breaks for areas that stretch longer than 50 feet in any one direction. This will diminish the strain on your boards, enabling better, longer-lasting performance. Installing T-molding in doorways or wherever you need to run the flooring for longer than 50 feet is effective. Note, however, that when glued vinyl is affixed to the subfloor for stability, it will be restricted from expanding or contracting.
Vinyl flooring uses one of three methods for installation: click/lock, glue-down, or peel-and-stick. However, when your LVP (T) flooring will be exposed to direct sunlight, using glue during installation will help resist the warping and buckling that excessive sunlight may cause. Peel-and-stick is not recommended for exposure to direct sunlight. We recommend only LL Flooring-approved pressure-sensitive adhesive, semi-wet, or approved wet set adhesives.
Once installation is complete, allow any adhesive used to cure (check your manufacturer's technical data sheet to find out how long) before returning your furniture to its place on the new flooring. And use luan board, plywood, or simply cardboard to protect your new planks when moving furniture around.
The Subfloor
Any flooring rests on top of a subfloor, typically made of either wood or concrete. Each one has its own distinct requirements for vinyl floor installation, so it's important to know beforehand what kind of subfloor your home has.
Wood Subfloors
Vinyl flooring can be glued to plywood or oriented strand board (OSB) subfloor or association grade particle board for certain adhesives. If your adhesive does not allow installation over a subfloor, first install plywood at least 3/8-inch thick over the particle board.
Before installing vinyl flooring on top of a plywood or OSB subfloor, first ensure that the subfloor is flat. There should be no more than 1/8-inch rise or dip over a 6-foot span, and a 3/16-inch rise or dip over a 10-foot span. Be sure to sand down inconsistencies, and use a Portland-based floor patch to fill in gaps, cracks, and other low spaces.
It's also very important that the wood is dry, with a moisture content that's 12% or less. It's smart to check the moisture content in a number of places along your subfloor—readings above 12% can indicate an issue and should be addressed.
Secure any loose areas of your subfloor, make sure it's clean and free of debris, and you're good to go!
Concrete Subfloors
Similar to wood subfloors, a concrete subfloor should be flat, with no more than an 1/8-inch change over a 6-foot span, or 3/16-inch over a 10-foot span. You'll need to grind down any high spots and use a Portland-based floor patch to fill in low spots or use self leveler to remedy any concerns.
Much like wood subfloors, it's essential that a concrete subfloor is clean and dry. Use of a moisture barrier (e.g. 6mil poly) is essential to prevent damage from moisture and alkalinity.
Tips on How to Install Vinyl Flooring
Vinyl flooring is installed using one of three methods: click/lock, glue-down, and peel-and-stick. Note: there are many click mechanisms available. Always check the specific product installation guidelines. But, before we run through what you need to know, let's make sure you have everything you need.
Your Toolbelt
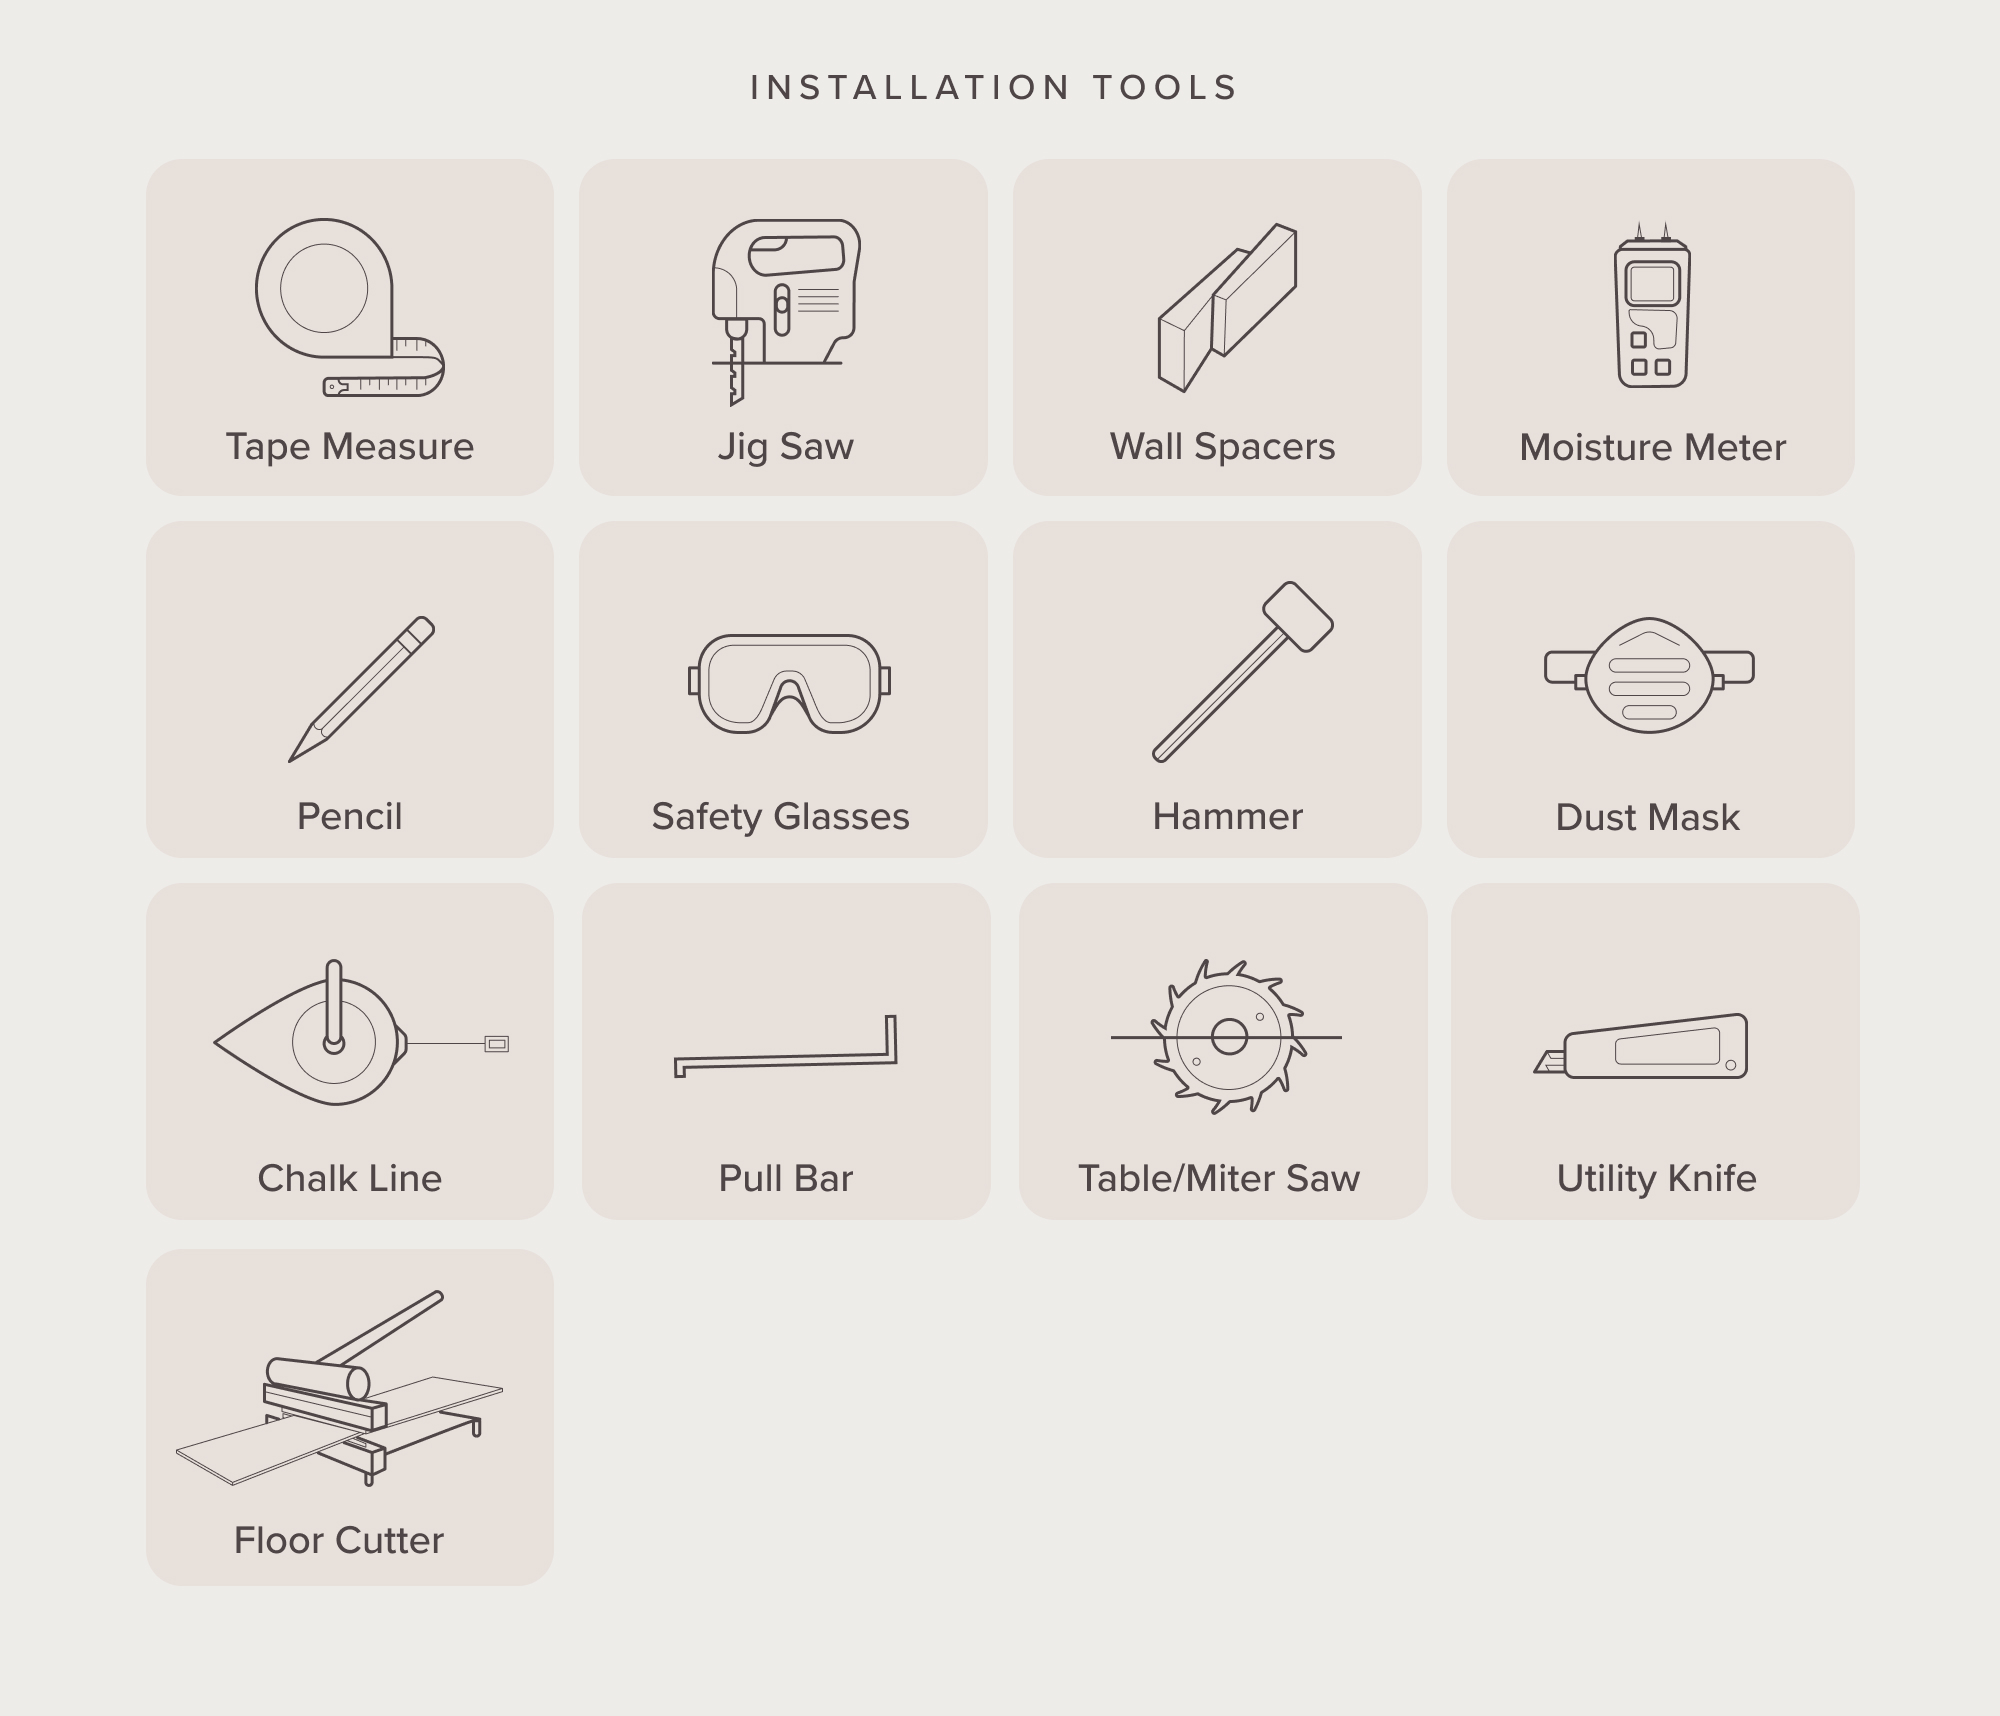
To do any job right, you need the right tools, and with a job as important as a new floor, this maxim is doubly true. For this job, be sure you have:
- Hammer and tapping block (not required for all products)
- Saws (jig saw, table saw, miter saw, door jamb)
- Flooring cutters (for less mess)
- Wall spacers
- Moisture meter
- Pencil
- Tape measure
- Pull bar (not required for all products)
- Chalk line
- Safety glasses
- Dust mask
- Knee pads
- Finish nailer for trim work
With these tools at the ready, you're set to start the job.
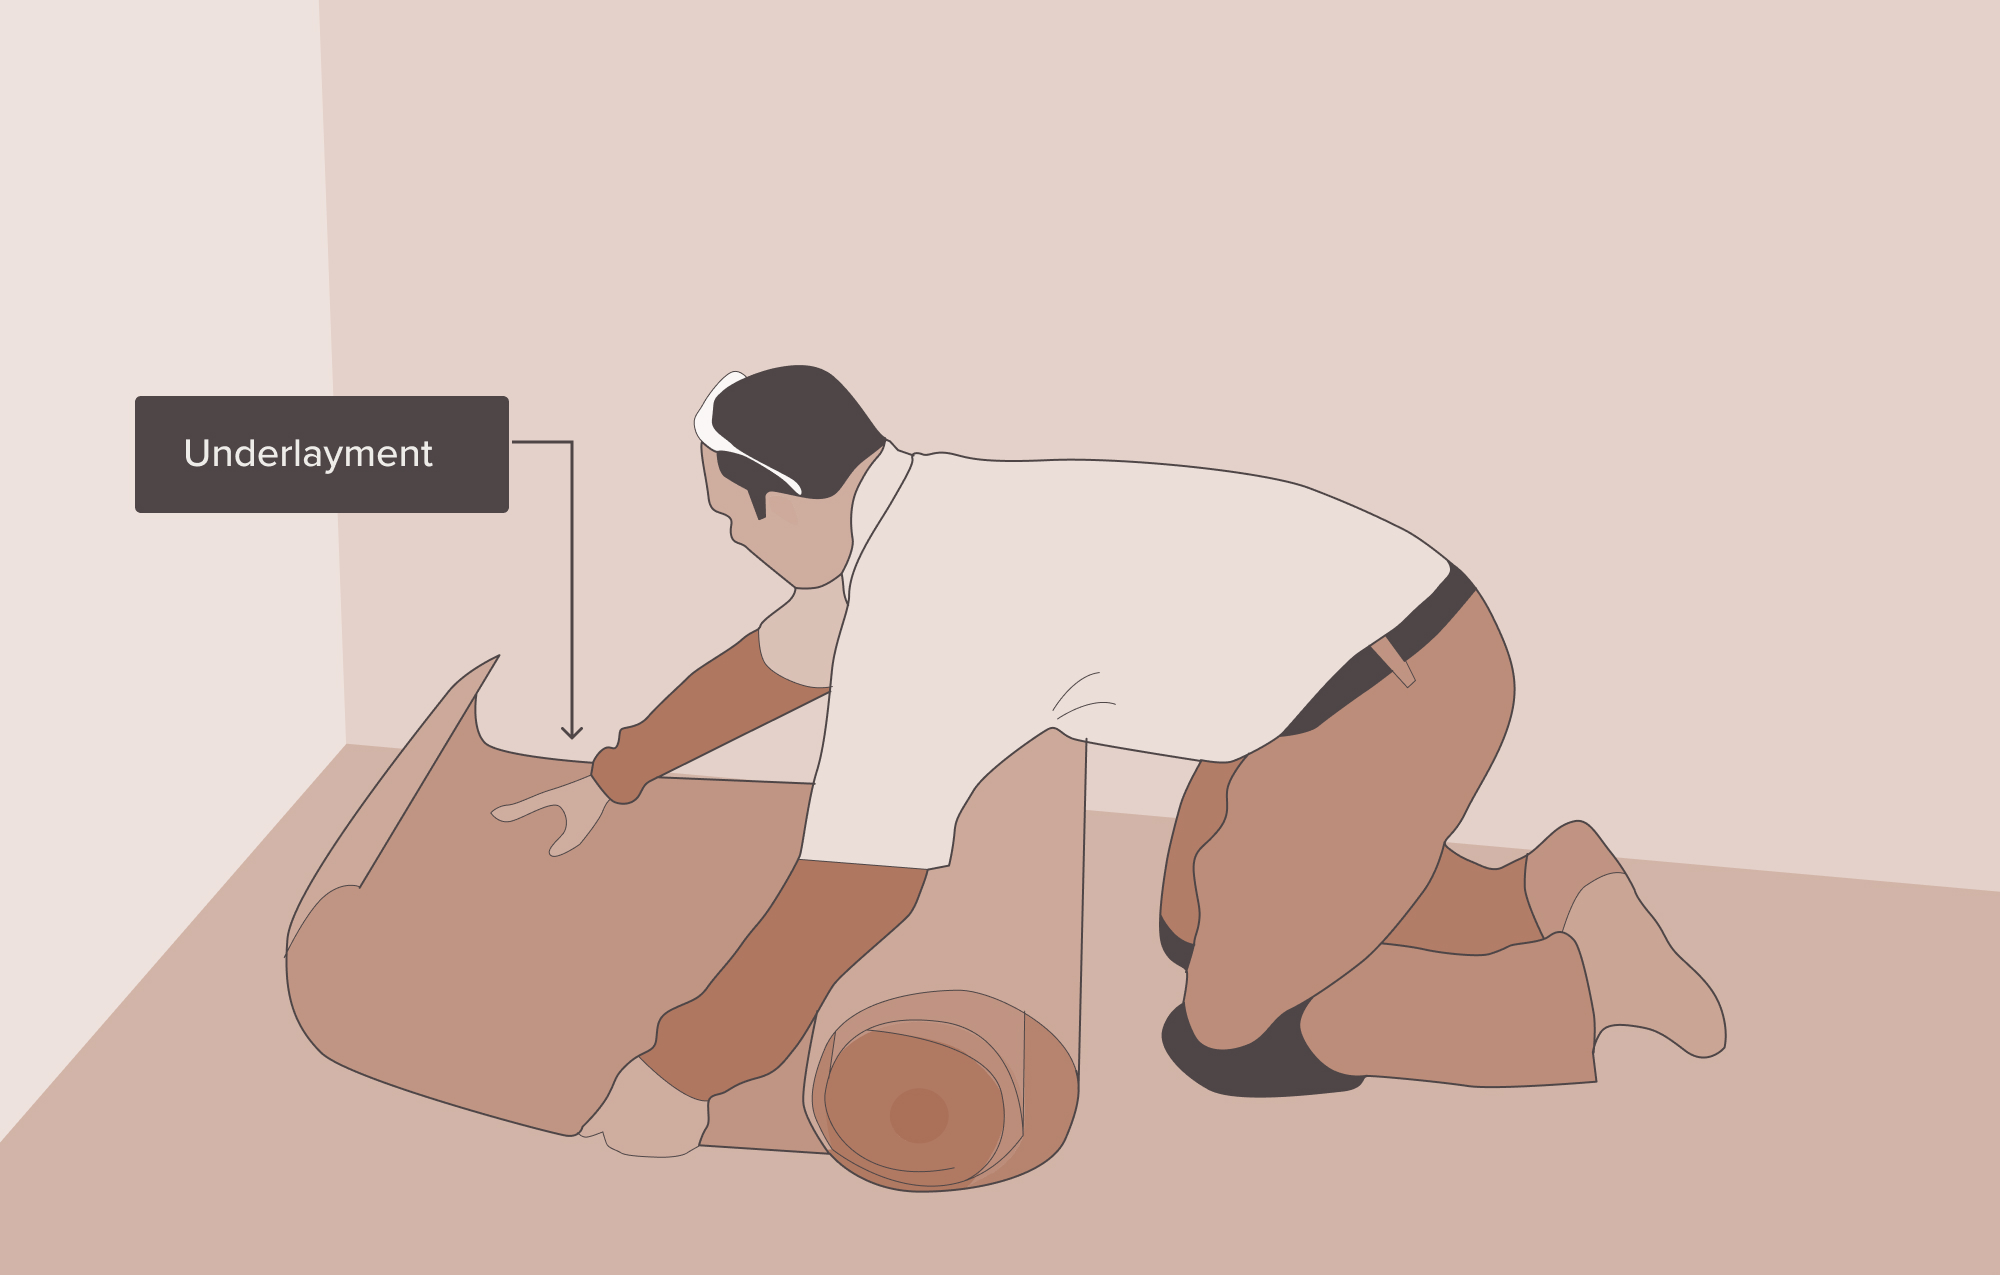
Underlayment
Underlayment is a layer of material that is laid between your subfloor and your flooring. Even when your flooring comes with an attached pad, additional underlayment can offer distinct benefits, such as improved sound and thermal properties. Particularly floors installed with click/lock planking or tiling can benefit from added padding. The underlayment will provide cushioning and support to improve the feel of the floor, help to absorb noise and create a quieter home, and help minimize subfloor imperfections.
Click/Lock Installation
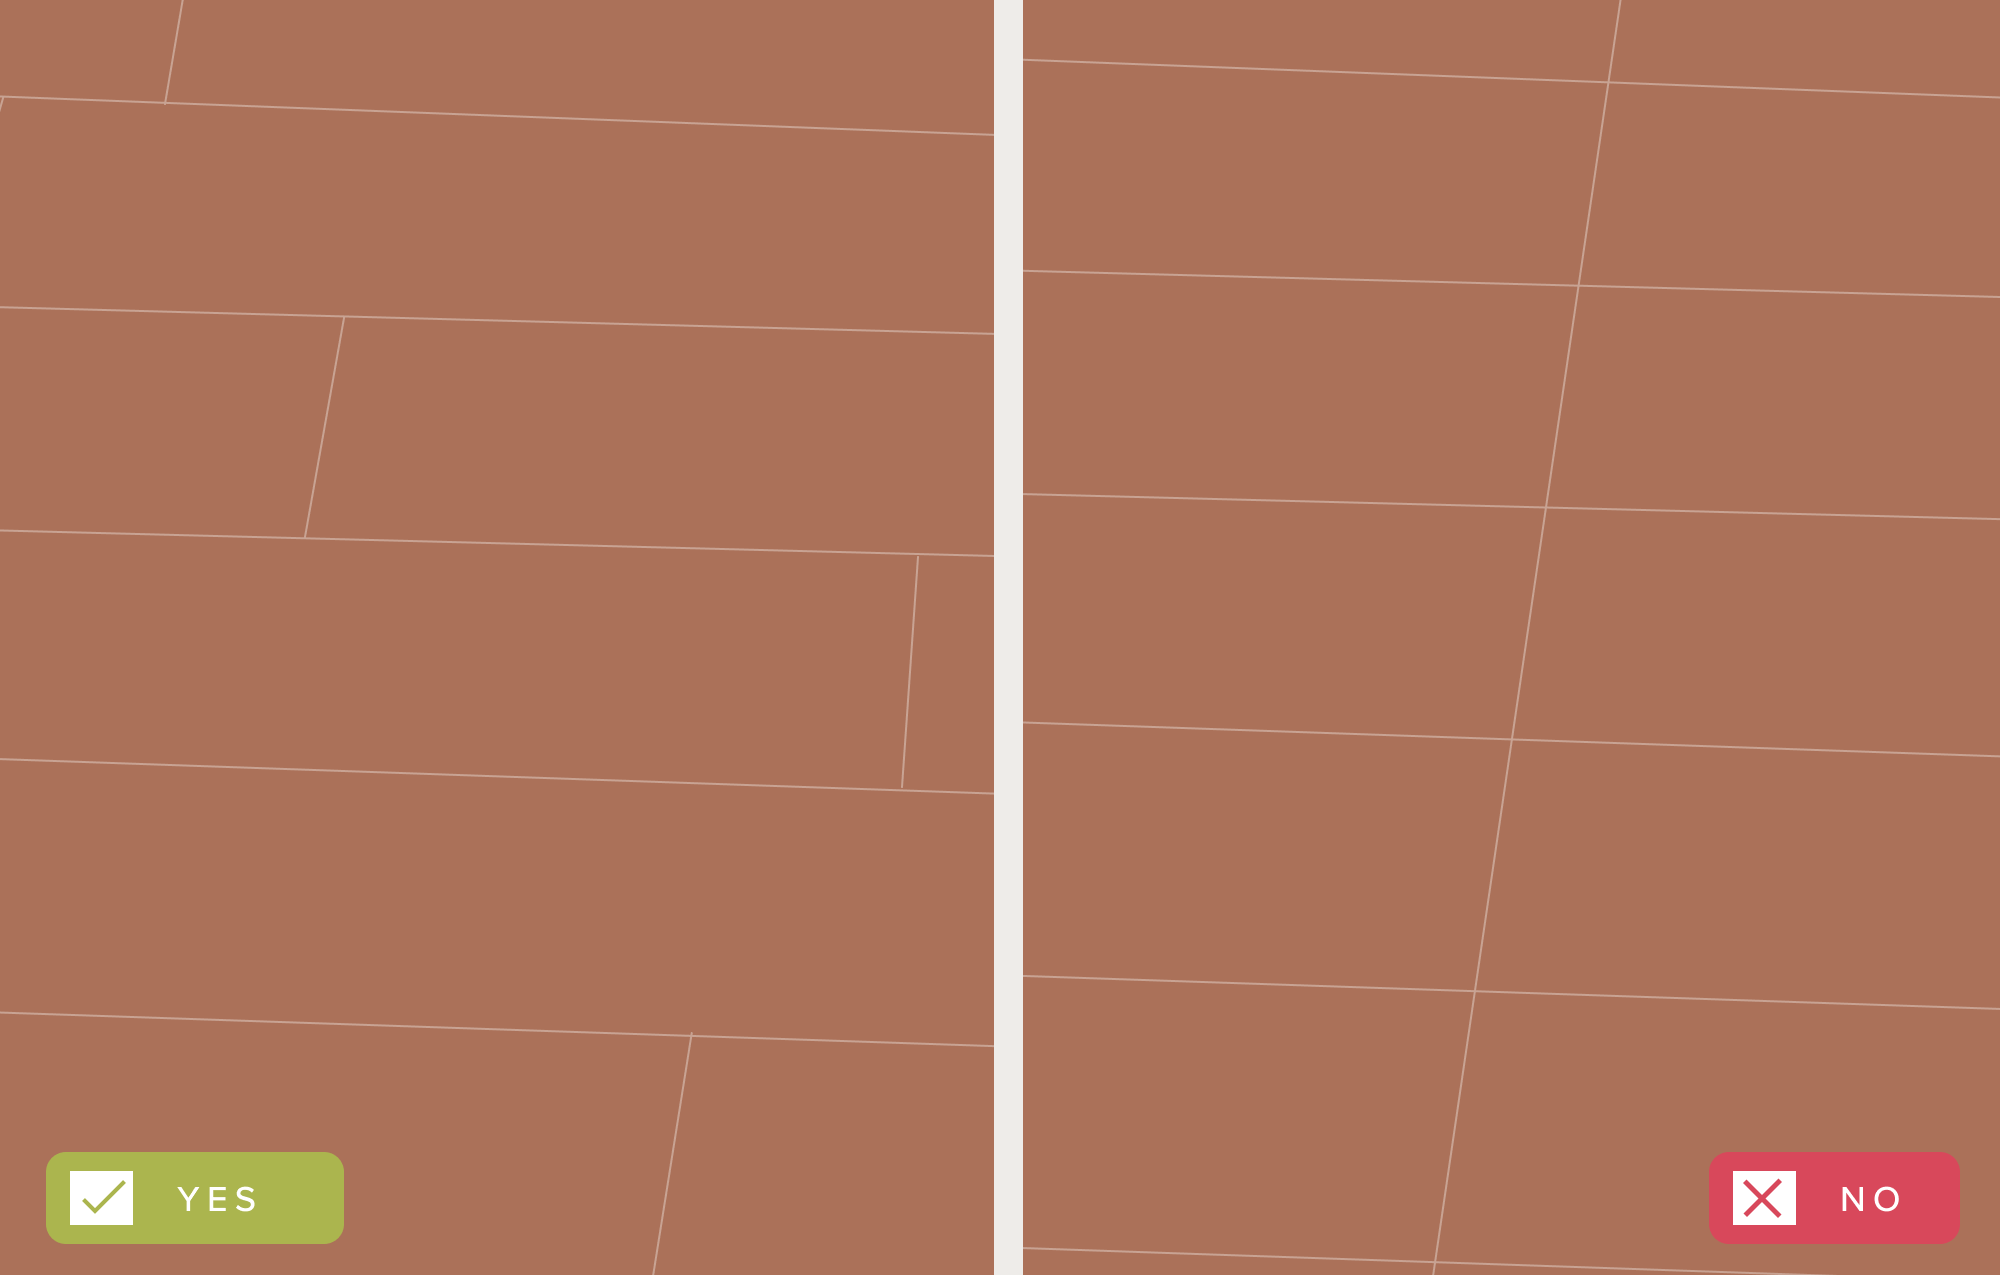
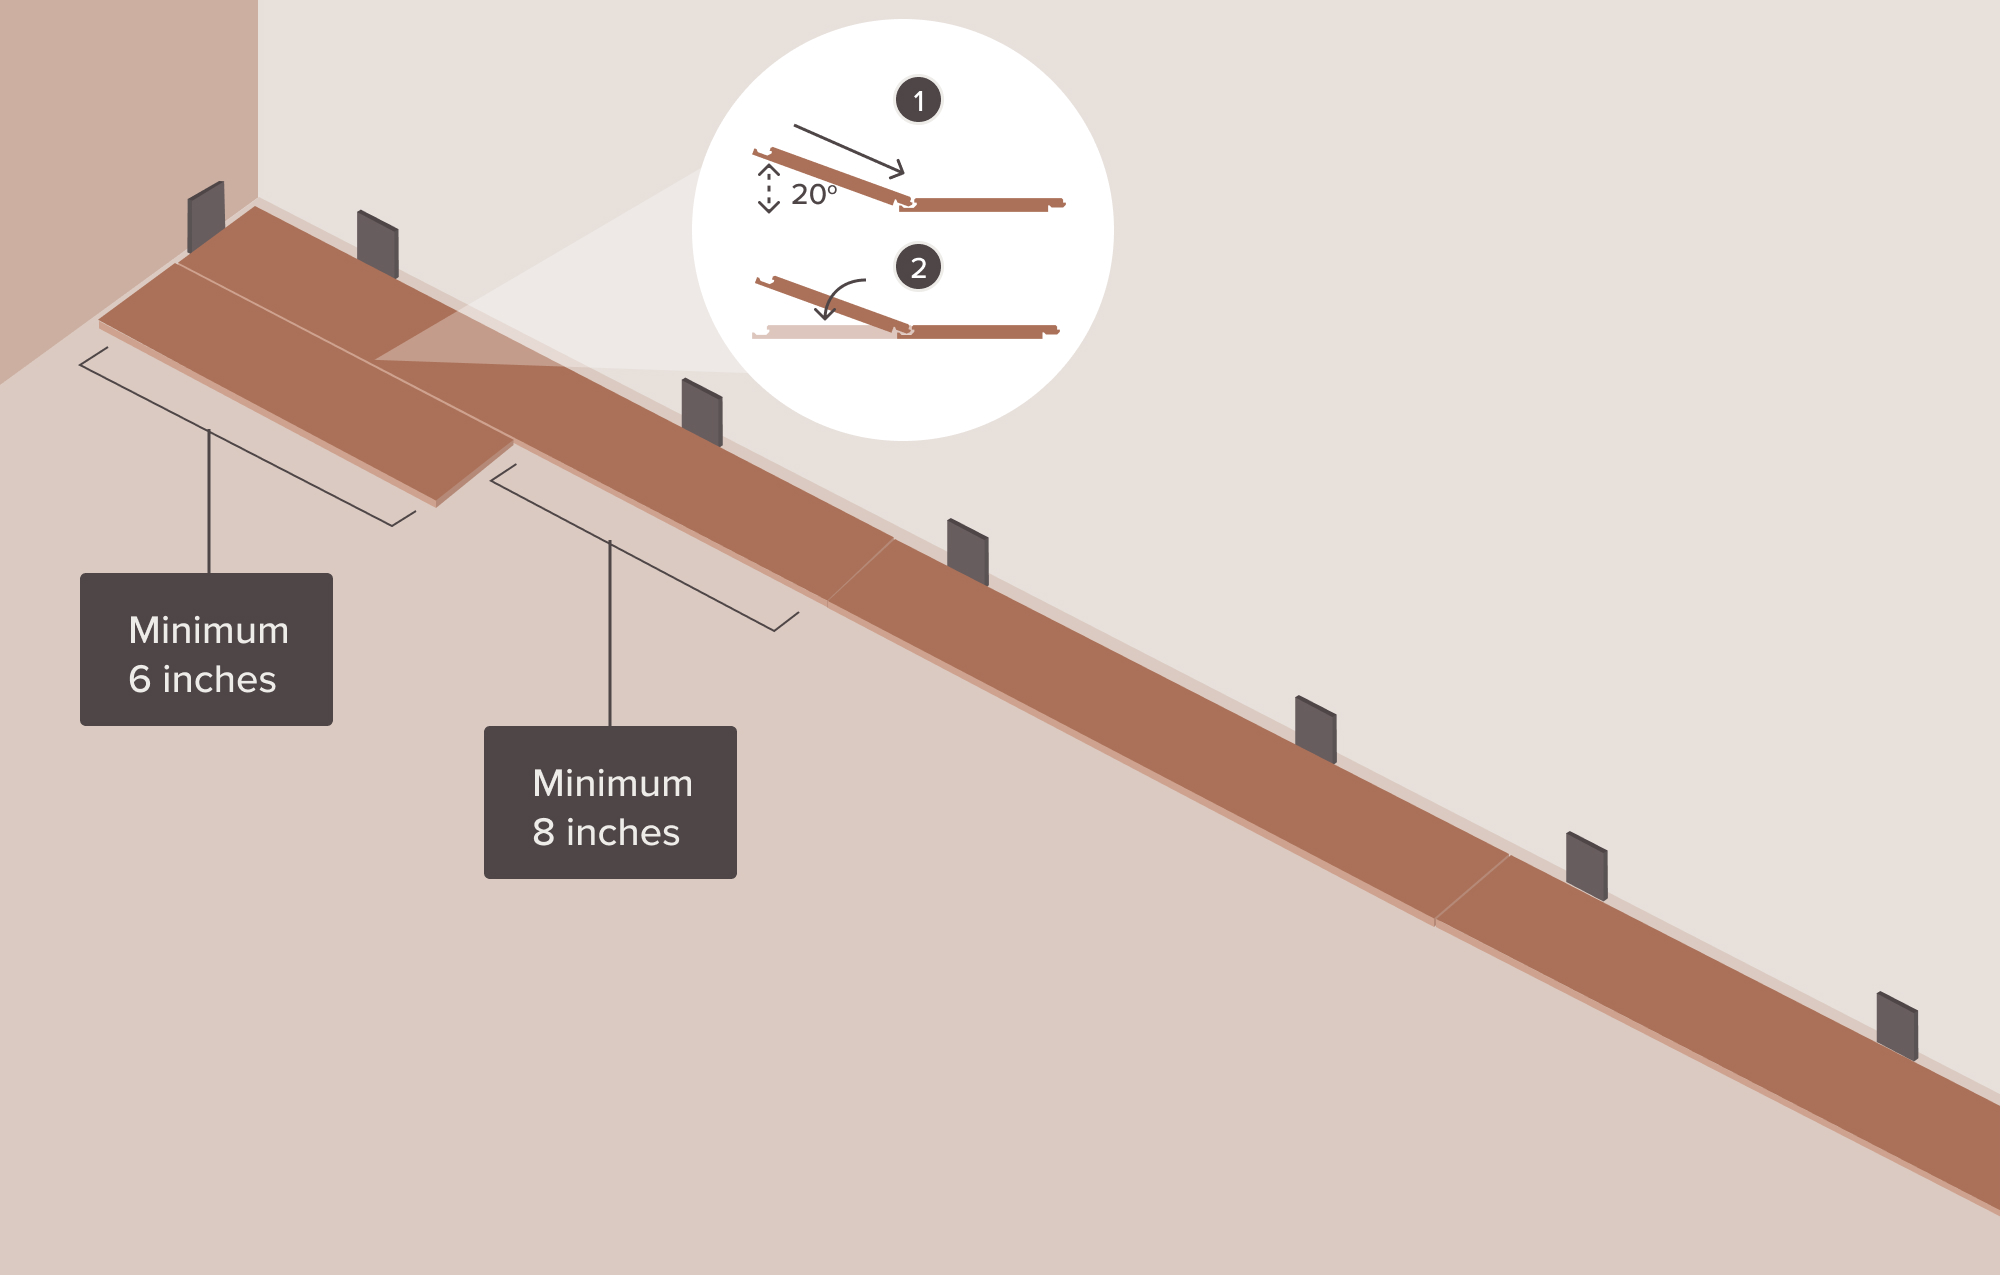
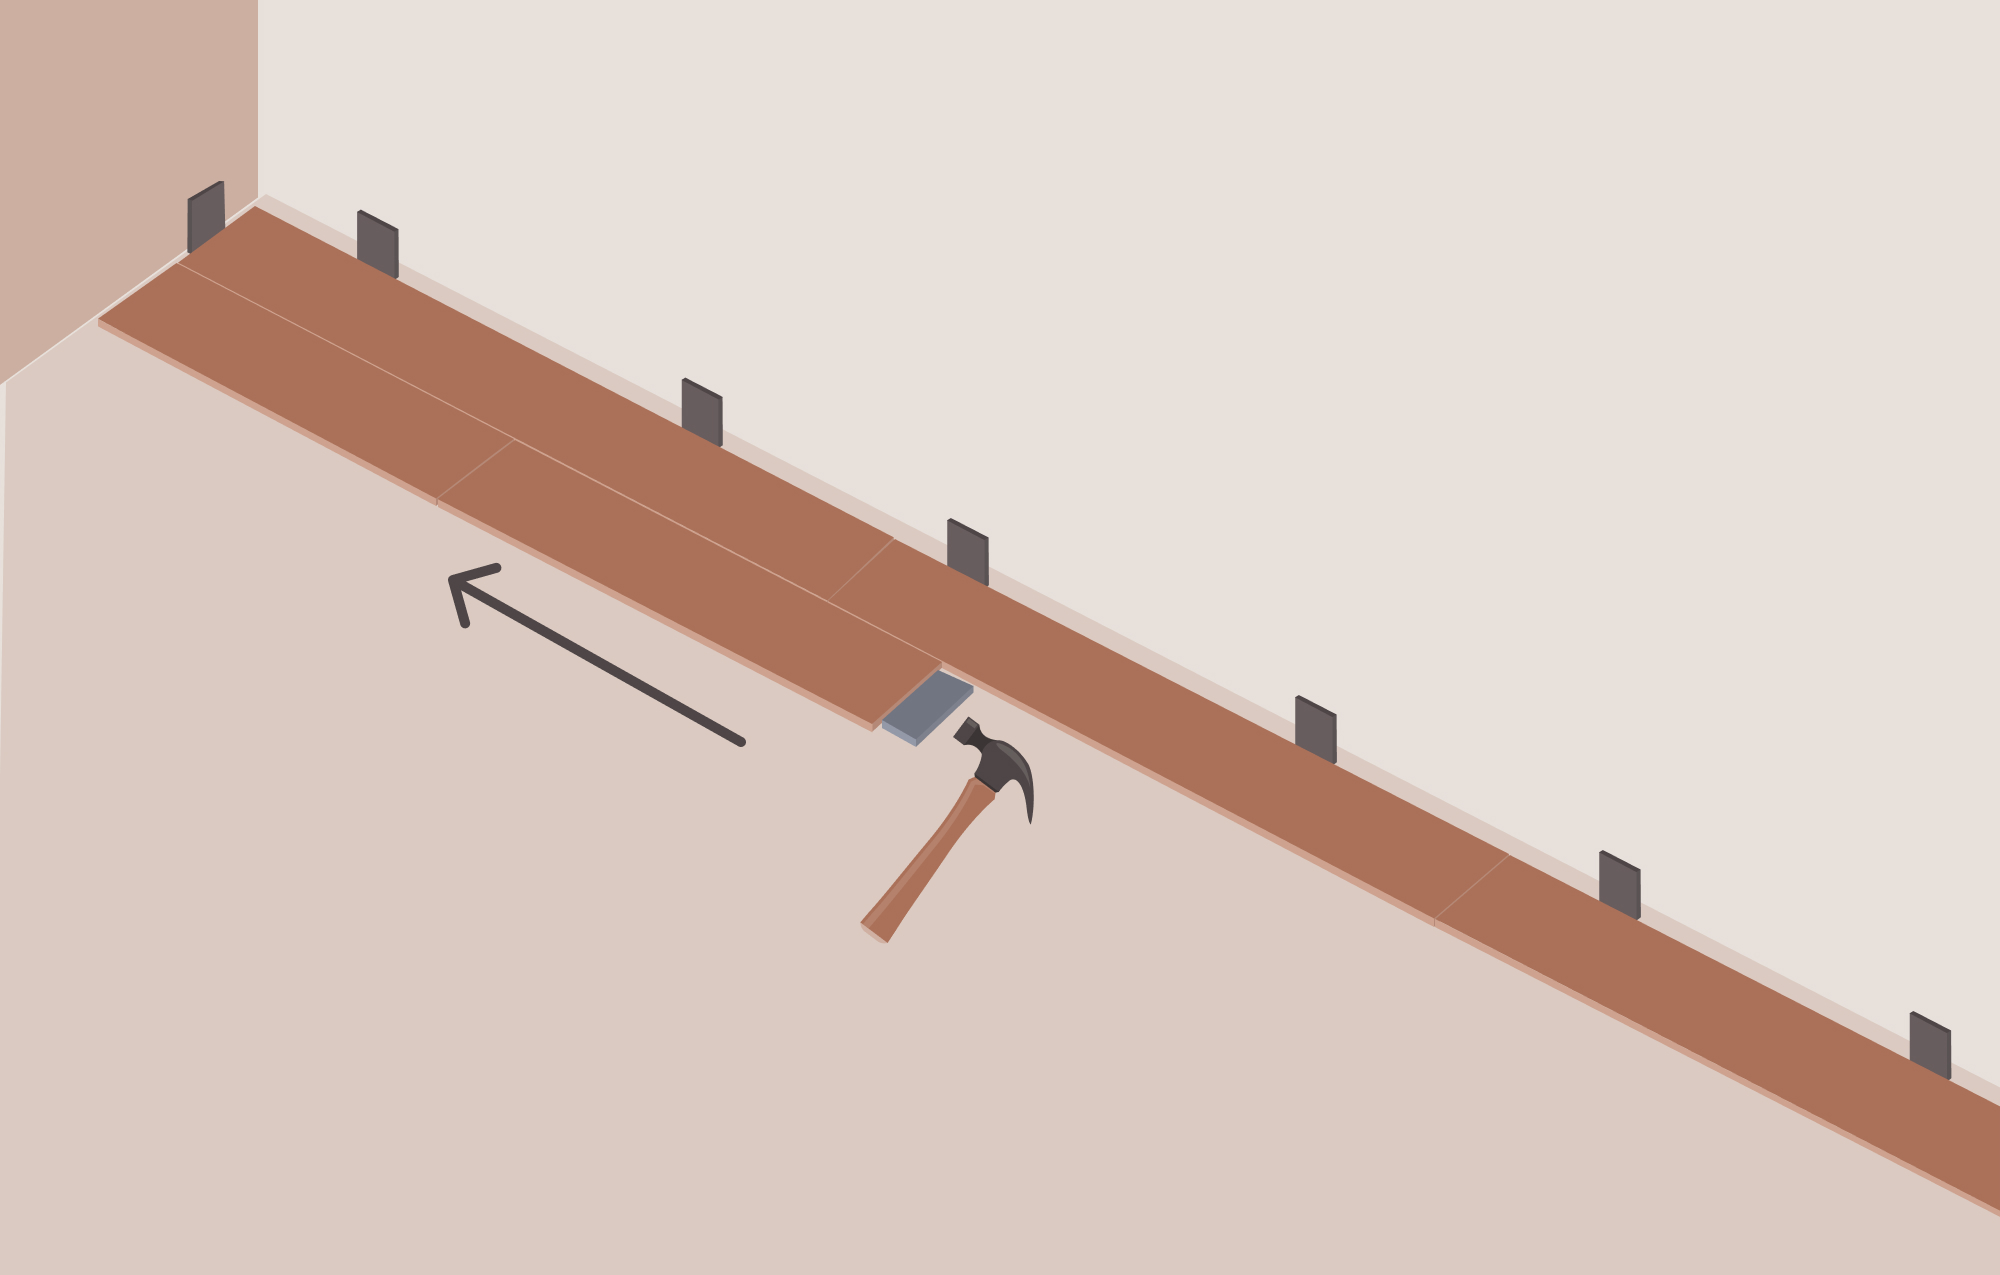
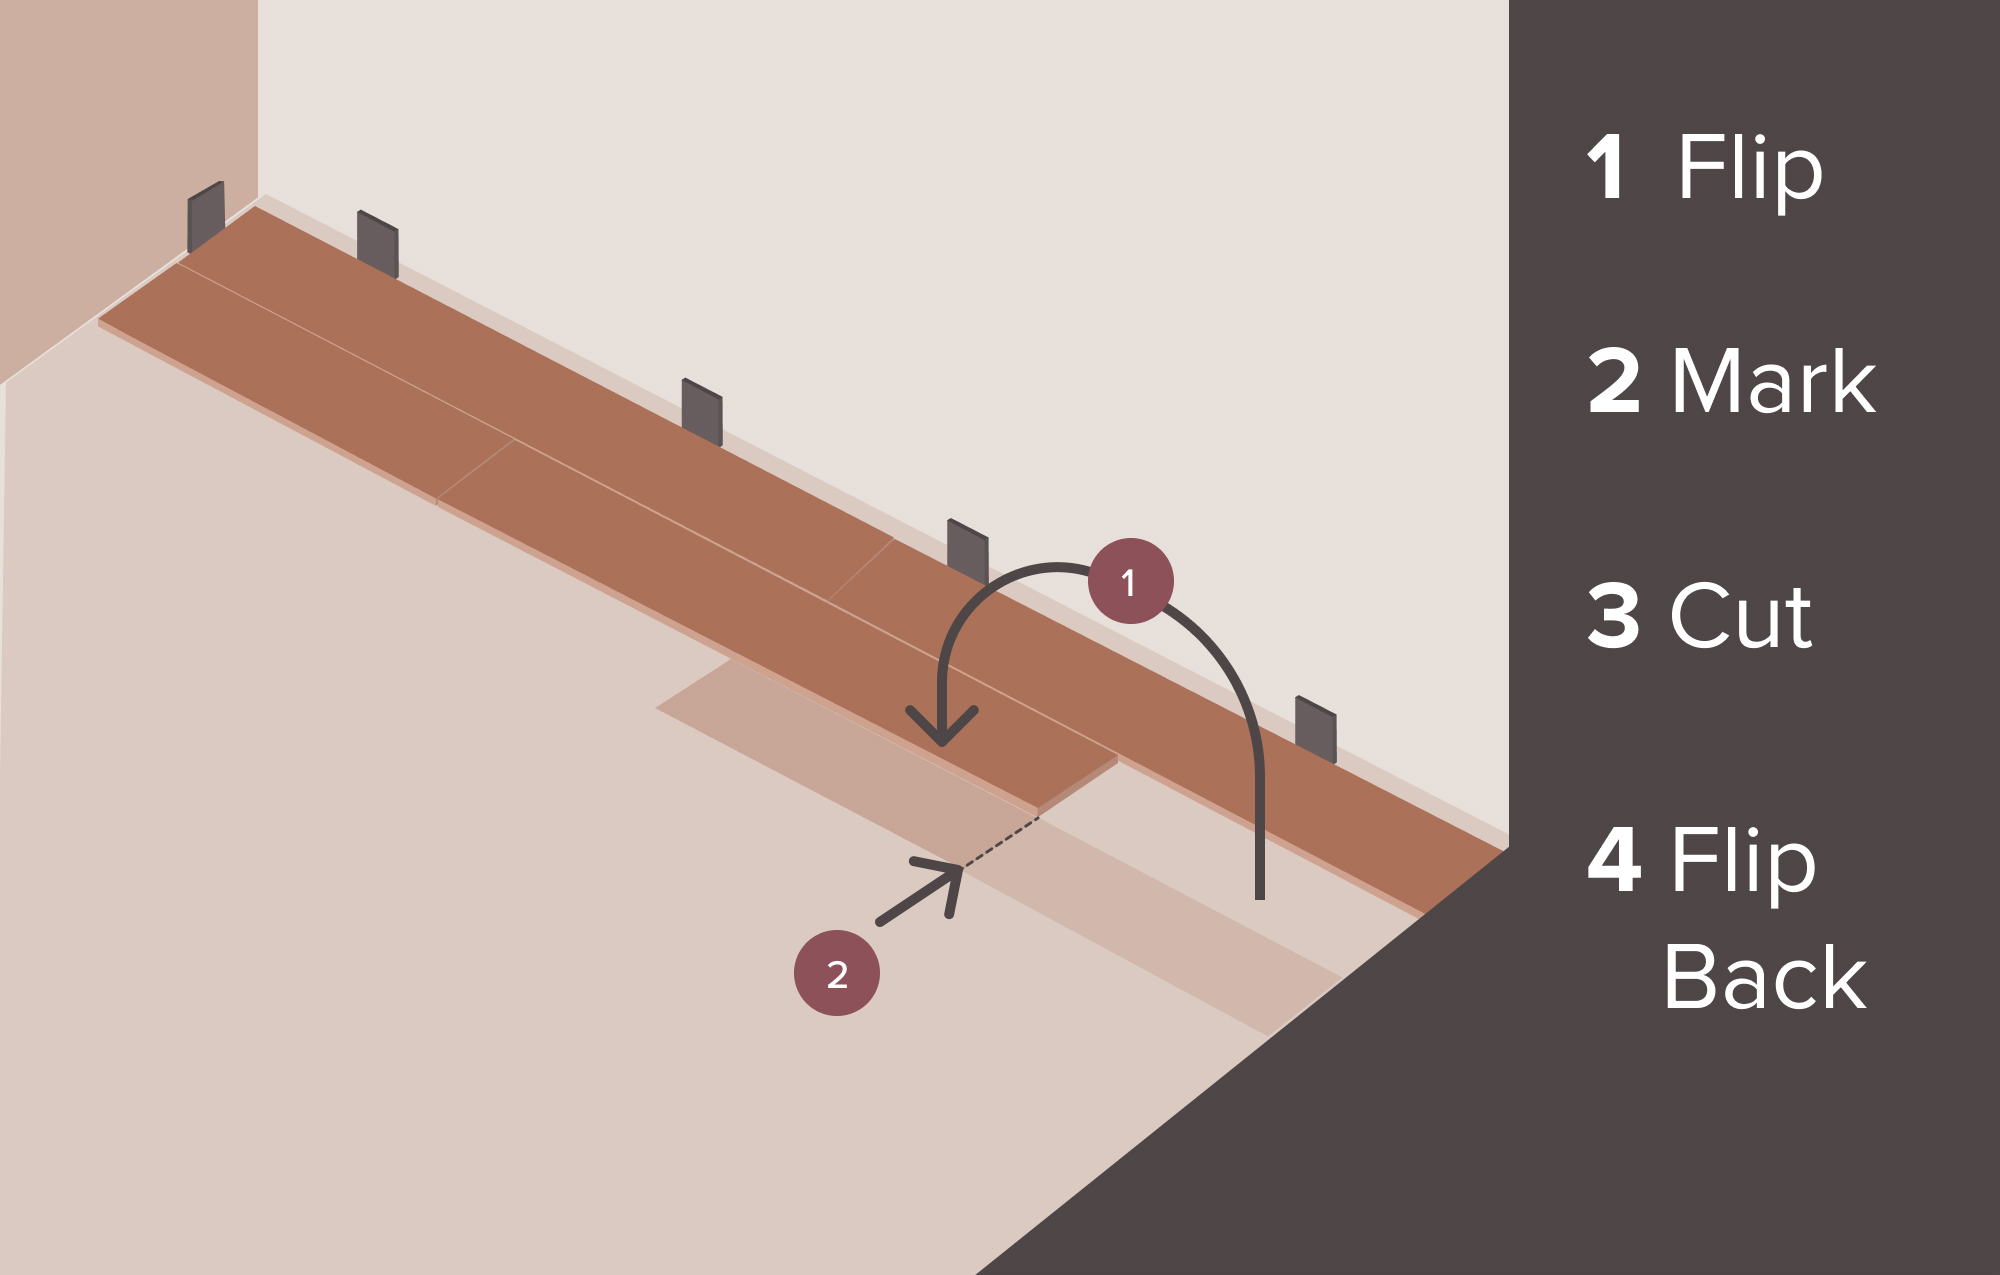
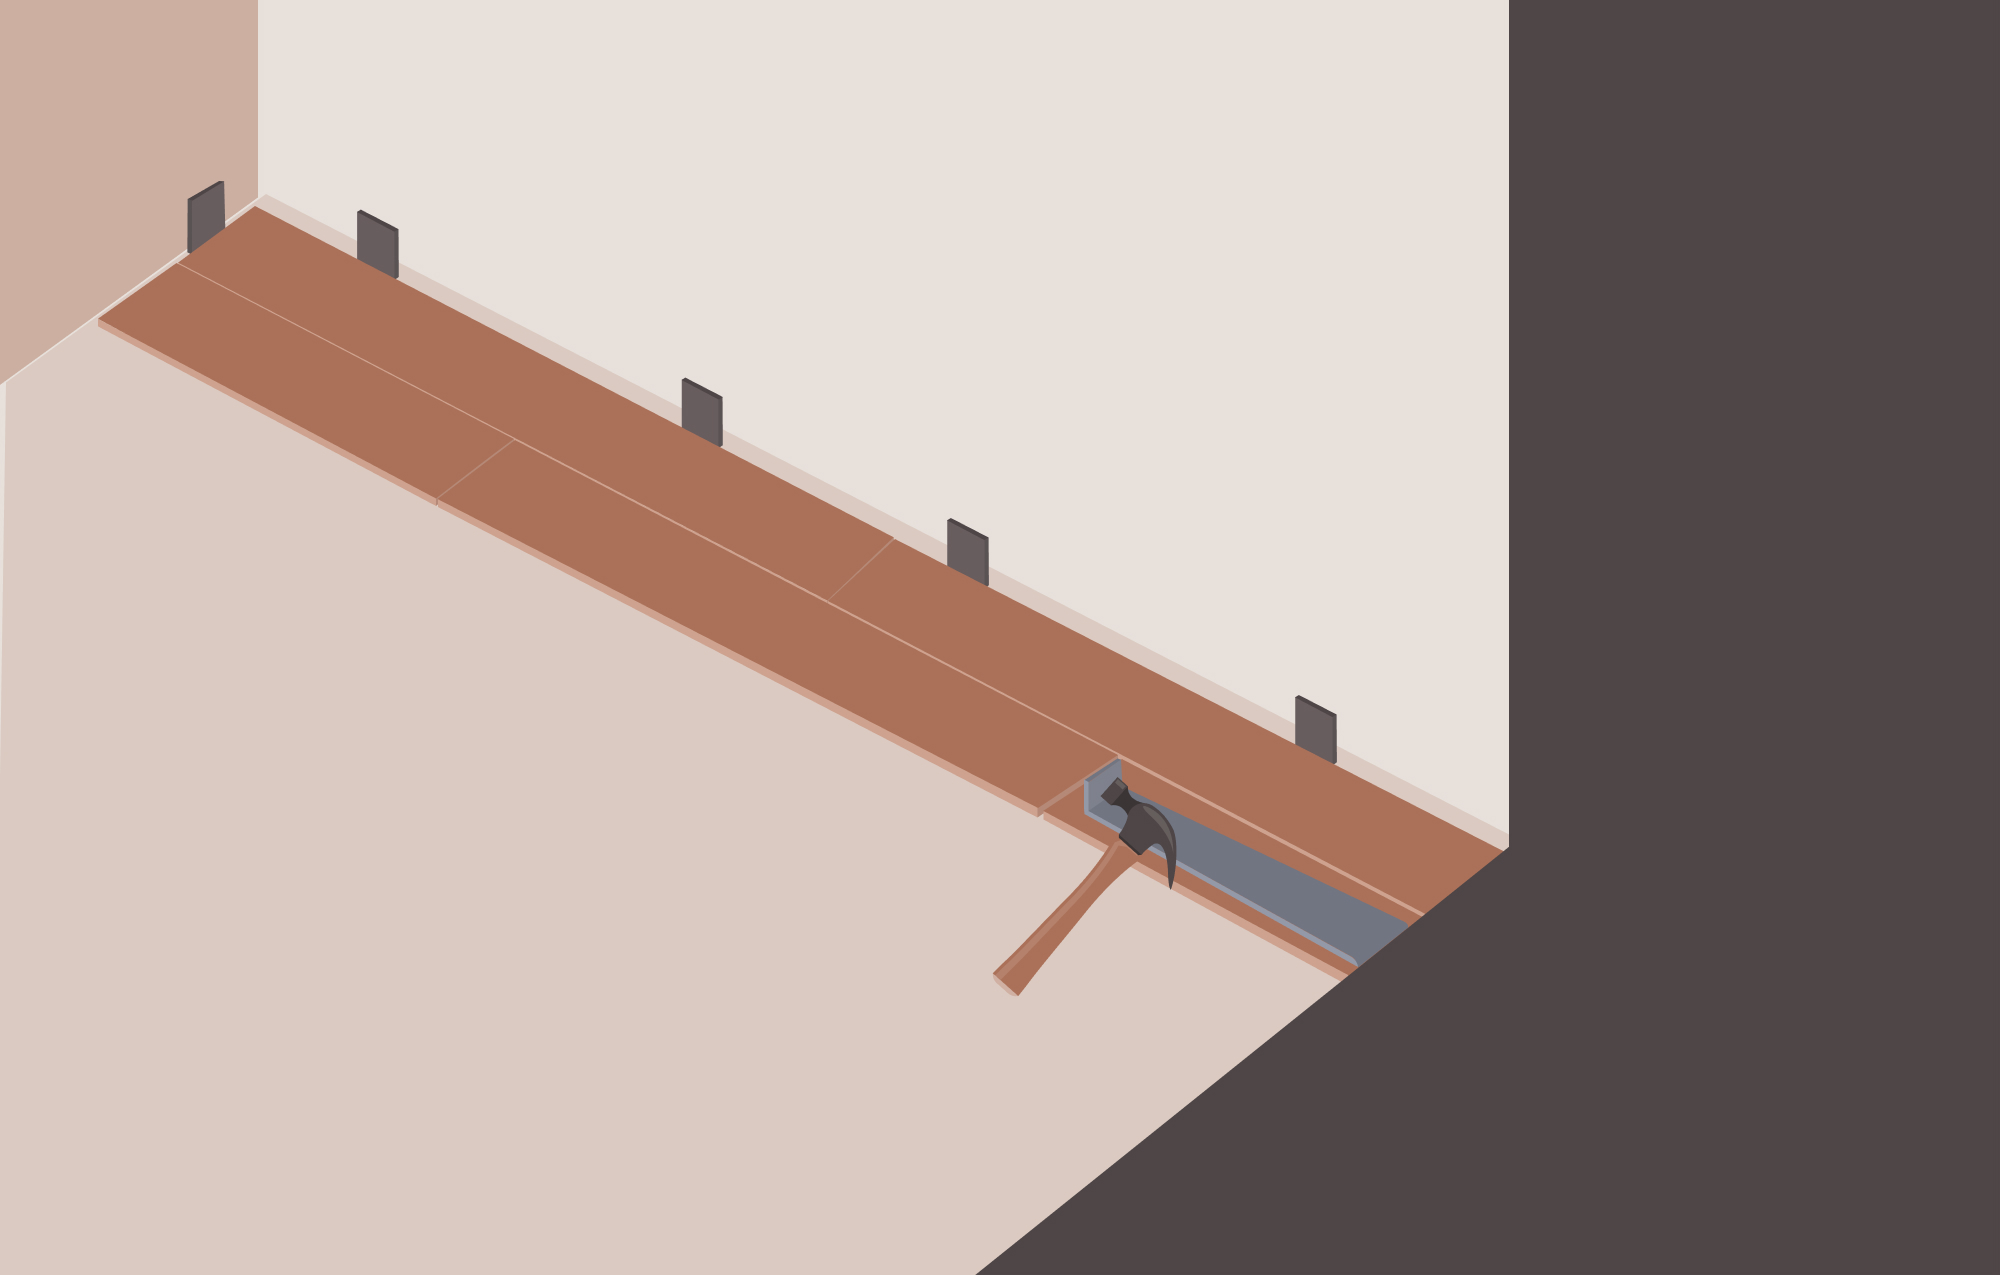
With click/lock installation, your planks or tiles easily lock together using a click mechanism. It's best to start installing parallel to your longest and straightest wall, which is typically an exterior wall. The groove side of your planks or tiles should face away from the starting wall. Also, be sure to use your spacers and leave a 3/8-inch expansion gap between your flooring and your walls. When you're selecting your planks and tiles, choose them from different boxes to mix them up for a more varied and aesthetically pleasing appearance.
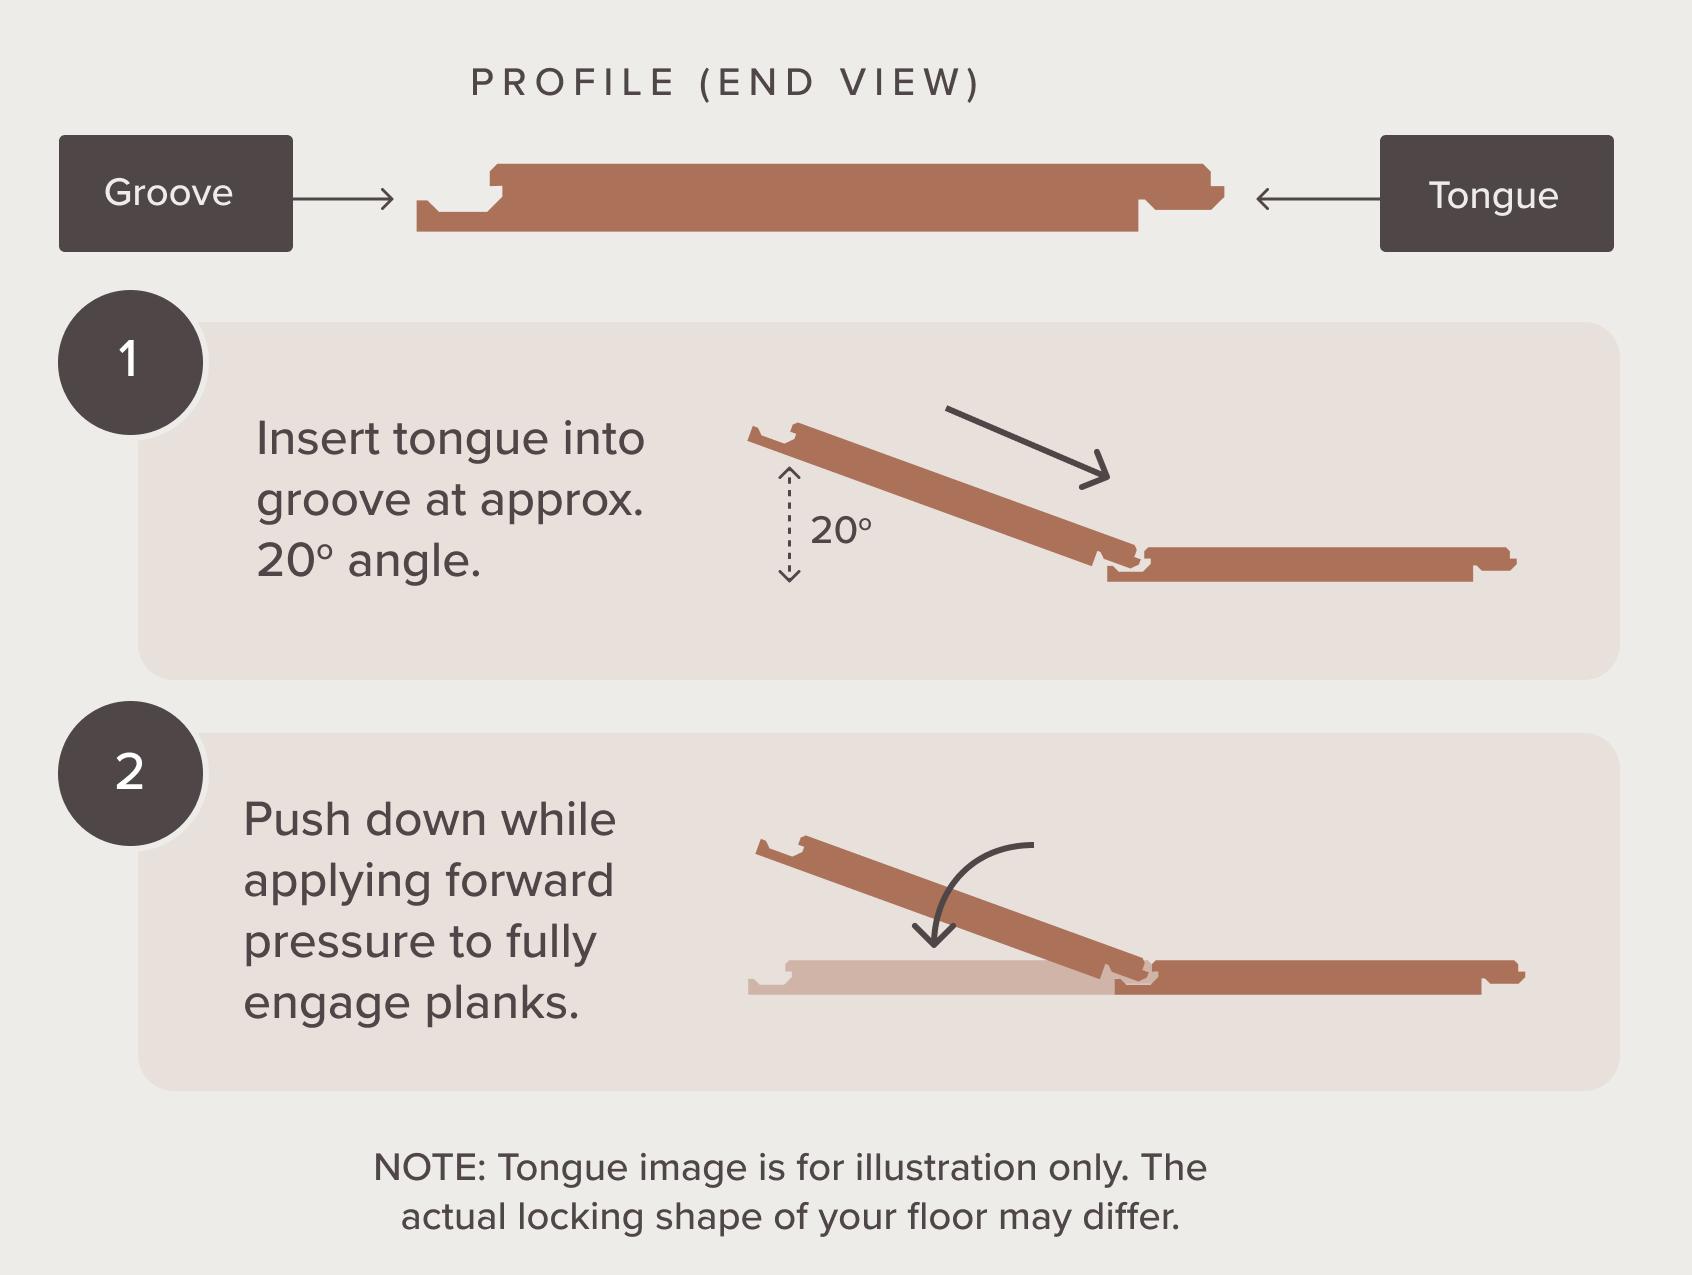
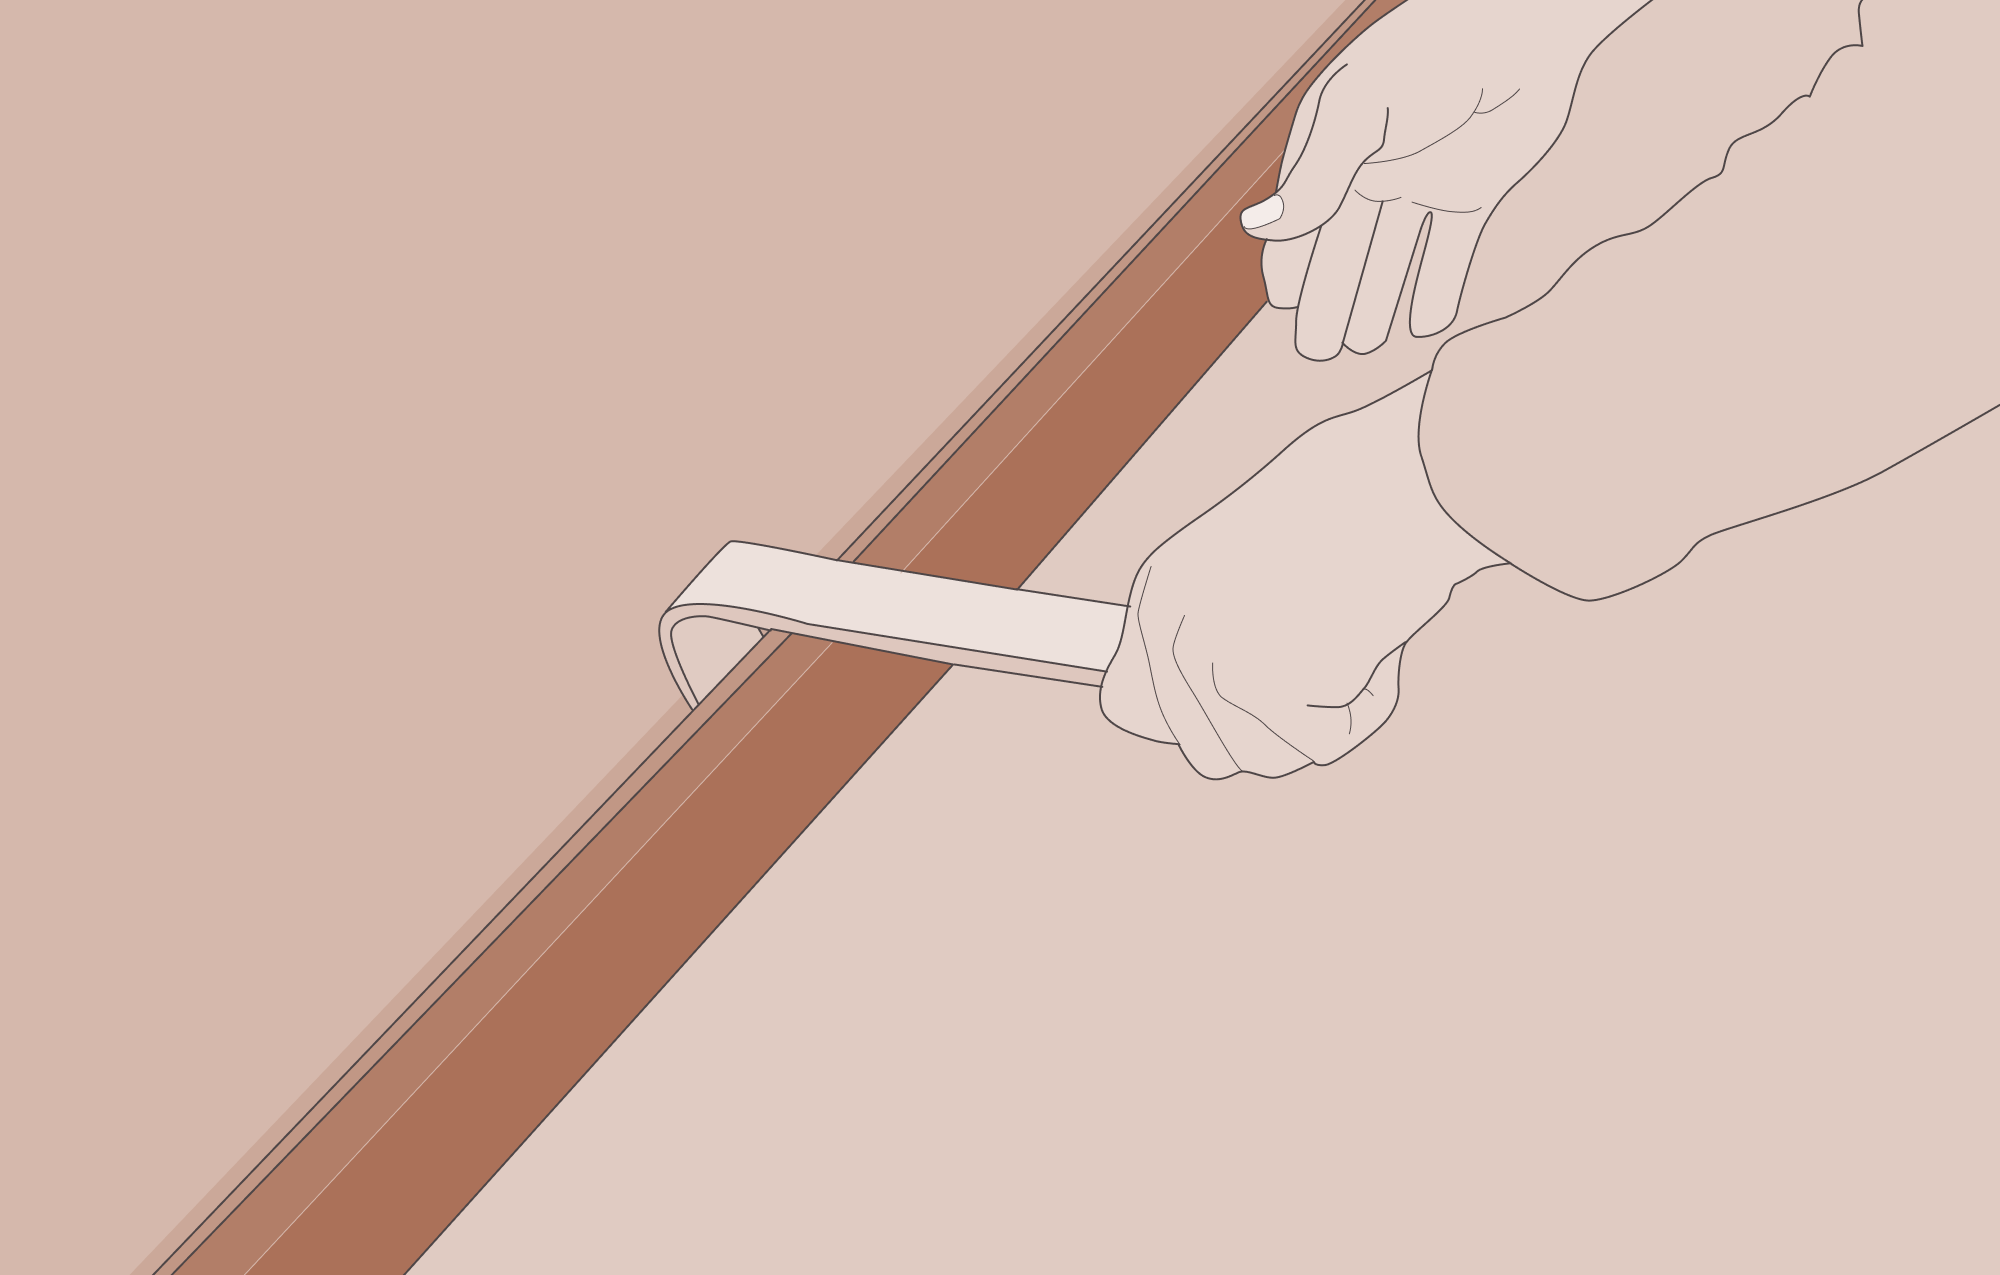
Carefully remove any existing trim/molding and baseboard using pull tool or pry bar.

When you're ready to click your flooring into place, simply lay two planks or tiles into position. And follow the specific product's installation guide.
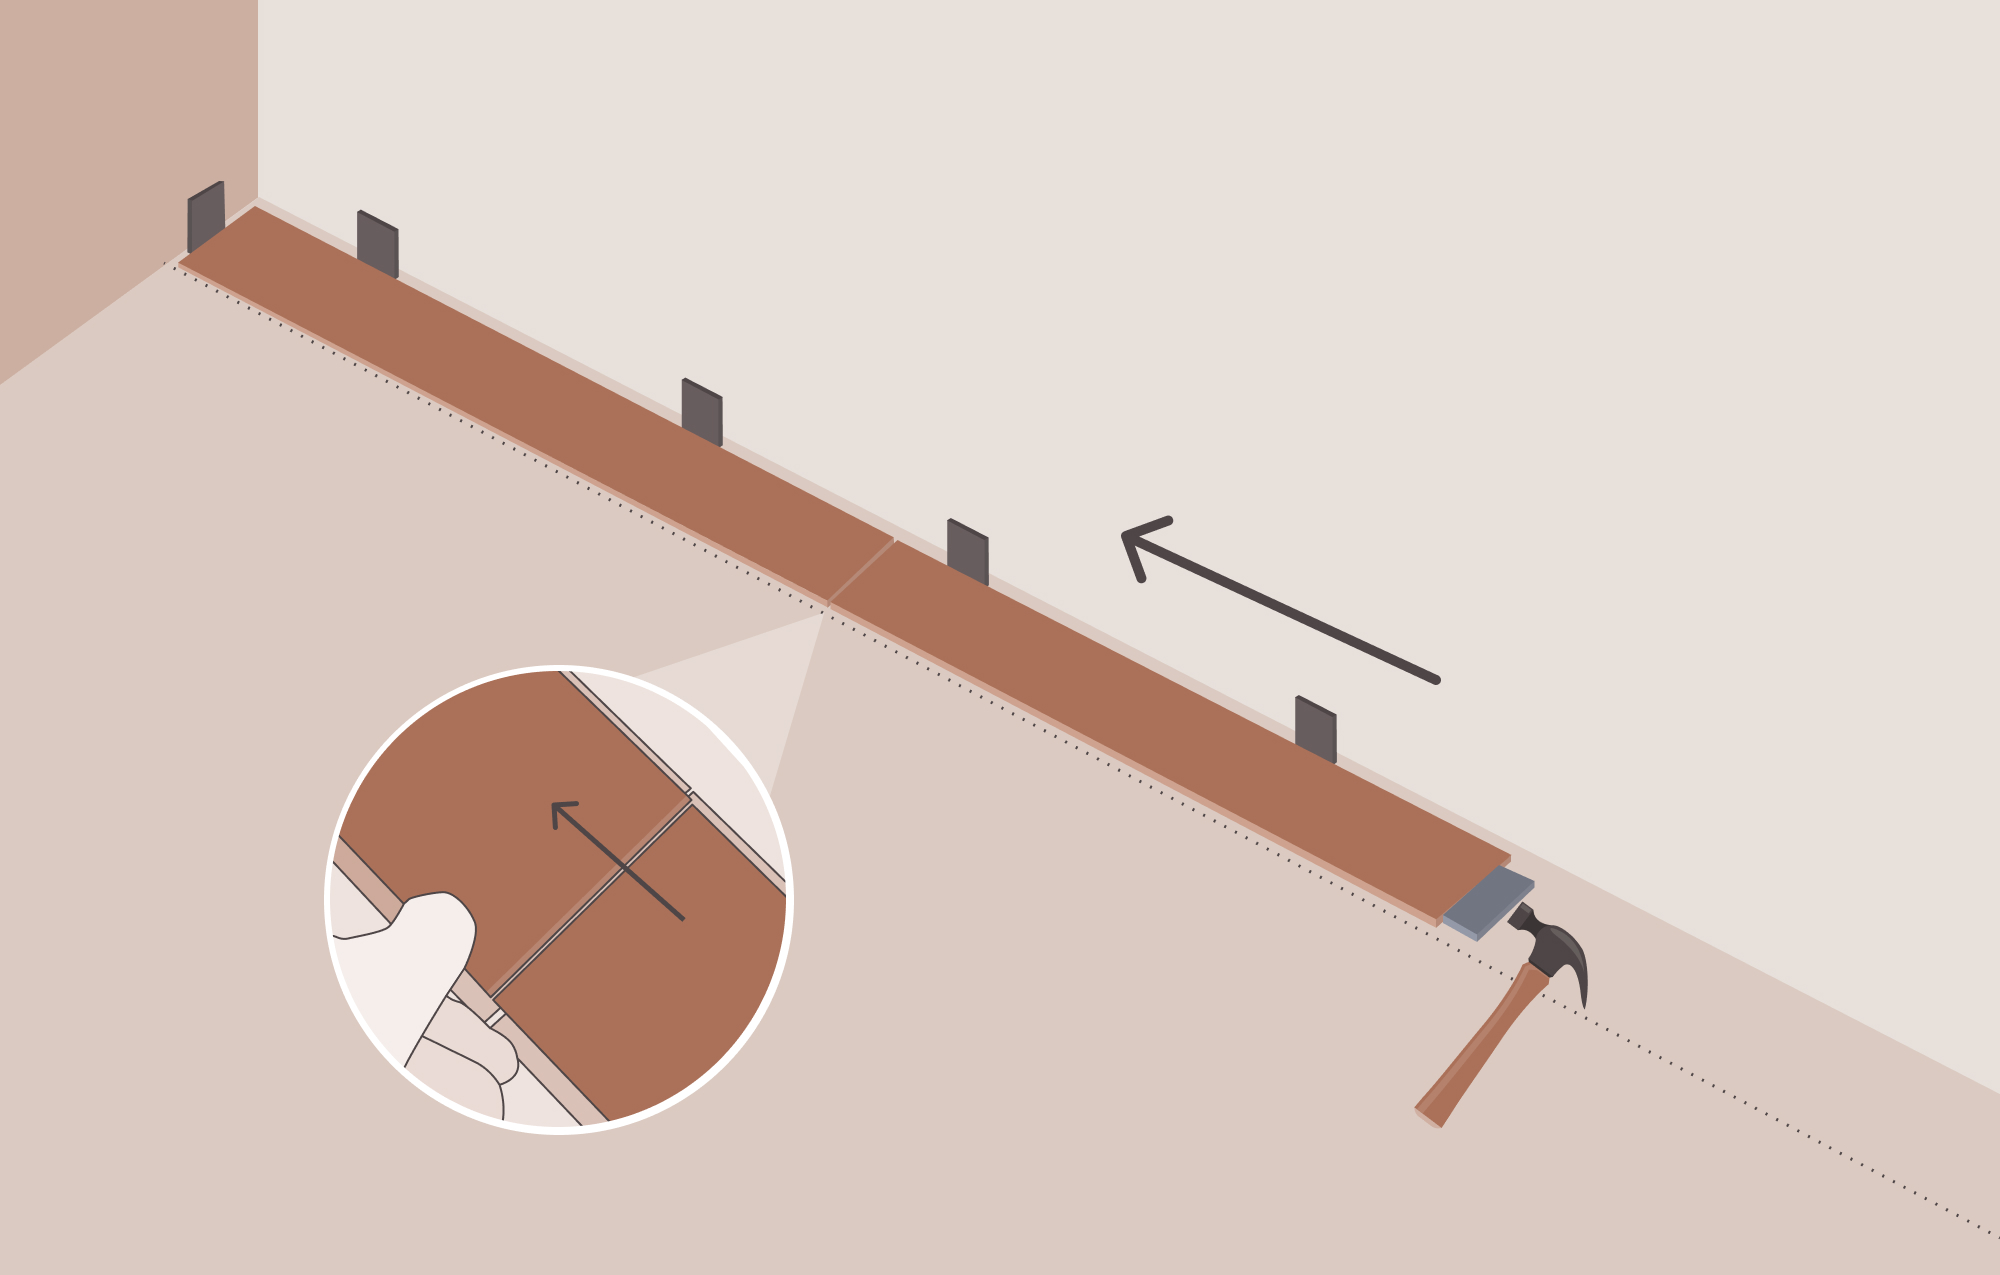
For the second row of flooring, lay your first plank or tile eight inches longer or shorter than the first board in the first row. This will create an attractive, staggered look.
Here's a video that shows a quick look at installing click-together flooring of four different types:
Once your planking or tiles click together, they create a floating floor that's immediately ready to be used.
Glue-Down Installation
Glue-down vinyl installation involves using an adhesive to secure your planks or tiles to your subfloor. Glue-down can require a little more effort than other installation methods, but the end result is a more secure floor that looks as appealing as any. It's essential that you use only LL Flooring-approved adhesive to ensure proper performance, as moisture and alkalinity from concrete subfloors can deteriorate certain glues.
Glue-down installation is especially advisable for commercial use, which can include heavy foot traffic as well as frequent heavy rolling loads. You can also glue down click/lock floors, and dryback vinyl such as Shaw Flooring's Acclaim Collection.
Once your planks or tiles are glued down, you'll need to wait for the adhesive's given dry time before use.
Peel-and-Stick Installation (DIY Only Product)
This is perhaps the easiest of your installation options and is available for our LVP or tiles. Peel-and-stick vinyl flooring includes a convenient pre-applied adhesive, though we do recommend using a latex primer to create a clean surface on the subfloor or existing floor prior to installation. It's absolutely crucial that all dirt, dust, crumbs, and other debris are removed, or you risk a weaker adhesion. And, you can't use underlayment with peel-and-stick.
Once your surface is clean, simply peel away the protective covering and lay your tiles or planks down on top. Because the adhesion of the flooring isn't as strong as glue-down, peel-and-stick is best for residential use. Once your peel-and-stick installation is complete, your new flooring is immediately ready to be used.
Molding and Trim for the Right Touch
As with many things in life, it's often the little things that make the real difference. After installing vinyl plank flooring, consider adding more interest with transitions and moldings that complete your home's interiors. They install easily and help create a complete look with stunning detail. Check out LL Flooring's molding and trim options and find the best fit for your home.
Transitions allow for expansion space for any runs that are 50 feet or more. They're also placed where flooring planks meet carpeting or tile, for example. They ease the transition (thus the name) from one type of flooring to the next, and serve to cover any gaps between the different floorings.
Molding is placed where your flooring meets the wall, covering gaps and imperfections. However, note that matching or complementary vinyl molding and trim itself is made of medium-density fiberboard (MDF) or plastic rather than vinyl. However, it includes a décor layer to match your vinyl flooring's look and style. Check out LL Flooring's accessories.
This video will give you a great deal of information about types of transitions, molding, and trim.
Taking Care
Once your flooring is installed, your goal is to keep it looking beautiful. Fortunately, with vinyl flooring, that's easy. It's often more a matter of what not to do: don't use cleaning agents with wax, oil, or polish, as they will leave a dull film. And, don't use steel wool or a scouring pad, as these can scratch your flooring and leave abrasions.
Instead, simply use a mop periodically with Bellawood Floor Cleaner, or even a residential steam mop, on low power with a soft pad. Between wet mops, you can sweep with a soft broom as needed.
One more thing: If you love vinyl flooring, but don't have the time or inclination to take on the installation job yourself, don't despair. LL Flooring can help you find independent professional contractors for your job (for all vinyl flooring other than peel-and-stick). Give us a call today to get your free estimate!
Related Articles