
Tips to Repair or Replace Vinyl Flooring
An occasional repair might be needed to prolong the life of your vinyl flooring.
Vinyl Floor Repair: What You Need to Know
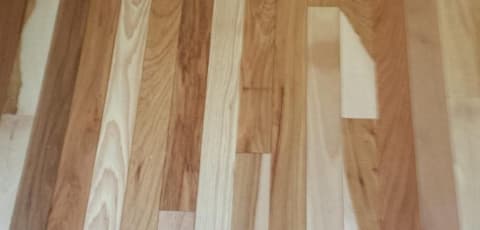
Vinyl flooring is one of the most resilient options available, but it’s not indestructible. If life happens and you find you’ve accidentally scratched, burned, or dinged your vinyl floor, there are simple steps you can take to repair the damage. Read on to learn more about the different types of damage and their different vinyl floor repair options.
Plan Ahead When You Buy
You might have heard that people often buy more flooring than they need for their installation and wondered why. This is partly because you generally need an extra 10% for a cutting or waste allowance. However, it's also very useful to have some extra, spare planks set aside in case you ever need to repair damage to your flooring. Vinyl flooring lasts a long time, and the variety of colors and styles available is always changing, so there’s no guarantee that you’ll be able to find the same flooring again should you need it. By purchasing extra at the start, you don’t have to worry about what to do in the event of any damage you might cause to your floor.
How to Repair Vinyl Flooring
The way you repair damage to a vinyl floor depends on the type of vinyl you have. You can repair vinyl plank or tile by lifting out the damaged tile or plank and replacing it with a new one, but sheet vinyl will require a custom-cut patch.
There are kits for tasks like vinyl floor scratch repair, but they can be tricky to use. The kits often require you to mix putties and create your own colors to match your flooring, which can be a challenge for some floors. We recommend using a ScratchCure repair pen for minor scratches and touch-ups.
Repairing Sheet Vinyl
Sheet vinyl isn't part of the selection on offer at LL Flooring, but we can still give you some tips on how to repair it if you need to. You can patch damaged sheet vinyl easily with a small replacement patch. After the floors have been laid, installers will sometimes leave offcuts behind that you can use. If you don’t have access to offcuts, look for a less visible place where you could remove a patch from your existing flooring, like in your closet or under an appliance.
You can both repair a cut and flatten curled edges in sheet vinyl with a glue-and-roll and a vinyl floor repair adhesive. With rips and tears, you need to act as soon as possible. If you leave them too long, the edges might wear down or become jagged and won’t match up neatly, leaving you with gaps in your repaired flooring.
Note
It’s important to keep patience and precision in mind with your vinyl flooring repair. Rushing the job by carelessly cutting or not waiting for the glue to dry will probably lead to needing more repairs. Any inattention to how you remove a section, or any misaligning your seams can sometimes look worse than the original damage. It's worth investing the time to do the job well.
How to Replace Vinyl Flooring
Your vinyl flooring might be damaged to the point of needing to be replaced. For splits in a luxury vinyl plank (LVP), you could repair it with appropriately matched flooring, but the odds are that cracks with continue to grow so it’s best to replace the flooring. First, be sure to see if you have a floating or glue-down installation, as this will influence how you remove your planks. Then you'll want to correct any issues with your subfloor that may be causing the issue, as you don't want the problem to reoccur.
Replacing Glue-down or Peel-and-stick Flooring
To begin replacing glue-down or peel-and-stick vinyl flooring, start with an electric heat gun. This will get the damaged plank warm and soften the underlying adhesive. Once the plank and adhesive are easier to remove, use a putty knife or a wood chisel to raise the pieces of plank from the floor. When the damaged plank is out, make sure to remove all of the adhesive too. If the replacement plank has pre-applied adhesive, carefully extract the protective paper and firmly place the plank onto the ground. If you are using a plank you removed elsewhere, you can use an LLF-approved glue as an adhesive. In most cases, the adhesive will grab immediately, e.g., peel and stick or pressure-sensitive adhesive, and the floor will be ready for use. If using a wet set adhesive, place a heavy weight on the plank to hold it in place. In this case, wait for 24 hours before walking on the repair.
Replacing Click-lock Flooring
One benefit of click-lock flooring is that it's not attached to the subfloor with nails or glue. This makes it simpler to swap out damaged planks, though it still requires a little expertise. To replace a section of click-lock flooring, find the nearest wall that runs parallel to the damaged plank. Next, remove the baseboard if there is one, and then gently un-click the first flooring plank by raising the exposed side. Carry on removing the planks in this way, up until you reach the one you want to replace, and then click it out. Once you’ve replaced the damaged section, reinstall the boards you removed. Just remember to leave a quarter-inch expansion gap next to the wall and replace the baseboard.
If the plank or tile you're replacing is too far from a wall to make the above practical, then you'll need to remove the damaged portion using a multi tool or circular saw, set to the depth of the plank. You may to may need to “relief-cut” to the corners, then carefully disengage the rest of the plank. Once that's done, you'll need to modify the locking mechanism on your new plank, so you can angle it and drop it into place. This may involve removing the bottom section of the groove on the long and short sides. We recommend dry-fitting the plank to test the seal before you make any cuts. Once you're happy the fit is secure, carefully remove the plank and apply an LLF-approved adhesive to the locking edges. Quickly set the plank back into place, ensuring the edges are flush, and remove any excess glue immediately.
Maintenance Recap: Best Practices for Avoiding Vinyl Floor Damage
You can help reduce the likelihood of repairing or replacing your vinyl flooring by keeping it in good condition. Luckily, a key benefit of vinyl flooring is its easy maintenance. We recommend regularly cleaning your flooring with a Bellawood Floor Care kit. This affordable set of cleaning supplies has been specially developed for use with vinyl floors, and will provide a streak-free clean without harming your flooring's surface.
In order to best care for your vinyl floors, avoid using materials such as cleaning agents with wax, oil, or polish. Steel wool and other scourging pads might scratch your floors, so we recommend using a microfiber cloth instead.
Always put felt pads under your furniture to avoid unnecessary scratches and tears. Try to limit the frequency of wearing shoes indoors so you don't track in any extra dirt, pebbles, or other irritants. Mats or rugs in your entryways can offer additional protection for your floors, and if you have pets, make sure you keep their claws trimmed so as to not invite scratches from furry friends.
Please SUBSCRIBE to the LL Flooring YouTube Channel to learn more, leave comments that helped you, and join the community!
Related Articles